Ganon Battle
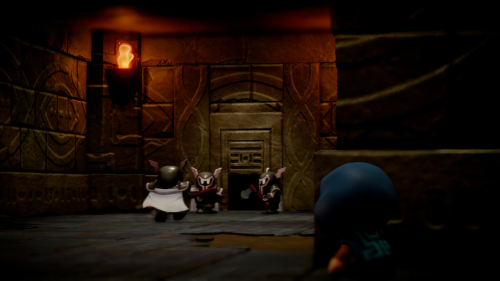

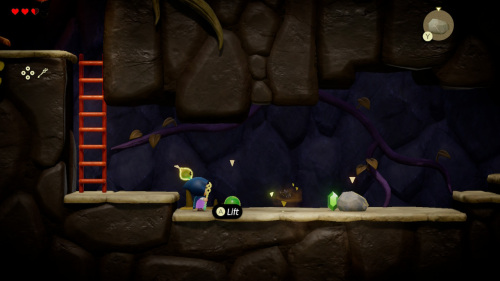
The game opens with you playing as Link with a full weapon kit and set of heart containers in the Suthorn Ruins. Walk forward in the hallway and take the elevator up to the next floor. You'll get to a section that seems impassable, but you can perform a jump with "B" to get on the nearby rubble. Continue to the right to a room with a few Darknut enemies you'll need to defeat.

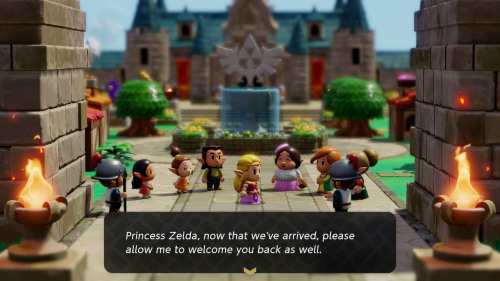
In the next area you'll need to continue to the left while defeating the Keese. Eventually you'll see some platforms you'll need to jump on to reach the door to the left. In the next room are a few more Darknuts to defeat and a long staircase. At the top of this staircase, you'll encounter Ganon who has captured Princess Zelda once again.

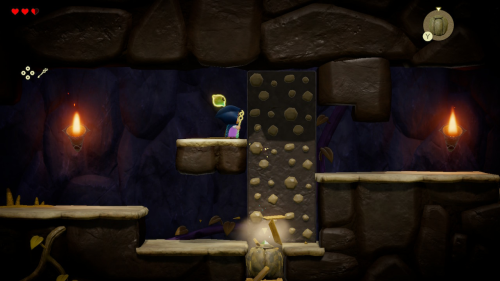
You'll then get to do a brief boss battle against Ganon. He has three short phases where you can run around and attack him with your sword and arrows. He also does the classic energy orb attack that you can reflect back at him with your sword to stun him for a while and deliver a lot of damage. Once he is seemingly defeated, a dark rift will open and Ganon will drag Link into it with him.
Princess Zelda


In the scuffle the crystal sealing Zelda away got cracked, so Zelda can now break out of it by wiggling the joystick. You'll now get to play as Zelda, the primary protagonist of this adventure. Walk to the bottom of the screen and pick up the clothes that Link left behind to get the Swordsman's Cloak.

The rift will then begin to grow larger and you'll need to escape this dungeon by running way from it. A little orb of light will guide the way. Follow this and remember to jump over any small obstacles in your path. You'll then find yourself outside in the Kingdom of Hyrule and see a nice pan over the castle and region.

Eventually some guards will come and escort you back to Hyrule Castle Town. When you arrive the townspeople will greet you with delight and suggest you speak with the king. You'll notice that there is another rift that has swallowed a house on the west side of town, but there's nothing we can do about that for now. Just head north into the castle.
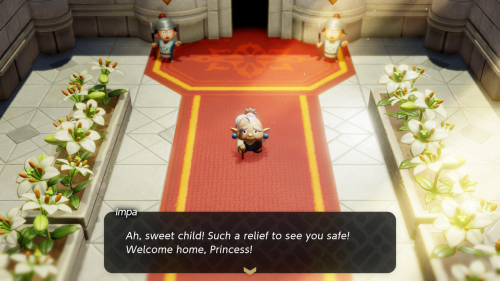

Follow the red carpet in the castle and you'll run into Impa. After speaking with her, continue forward into the throne room and speak with the king. As it turns out, people all across Hyrule have been disappearing because of these rifts. A soldier will come report to the king that more people are being swallowed by the rifts and some enemies are even emerging from them.
Escaping the Castle
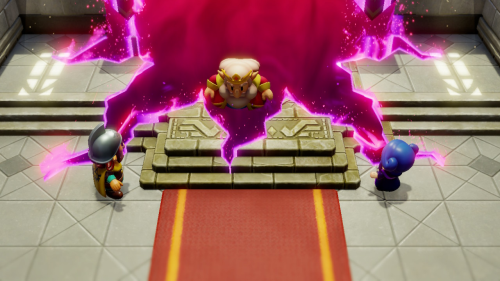

Just as you are leaving, the King, General Wright, and Minister Lefte all get pulled into a rift. They then reemerge from the rift as evil forms of themselves. The evil king then summons guards to lock up Zelda. You'll find yourself locked in a cell with nothing to do.


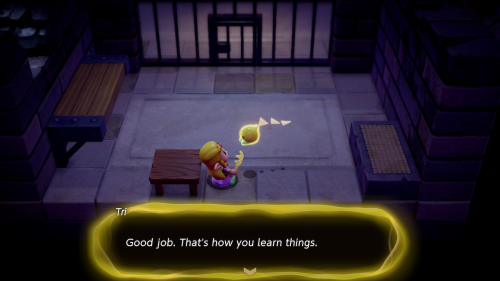
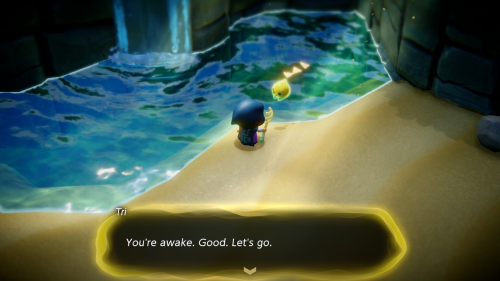
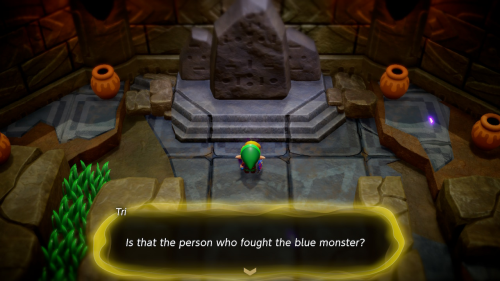
After roaming around the cell for awhile, a cutscene will play and the orb of light that guided you before will show up. This is Tri, and he will be Zelda's companion in this game. He gives you the Tri Rod to assist in your escape. This rod allows you to create echoes of various things in the world.

Use the rod with "ZR" on the nearby table to learn the table echo. You can then create an echo of the table with "Y" to get on the bench to the left. From there you can create another table echo to reach the opening in the wall to the left. This will allow you to escape and exit via the door to the left.
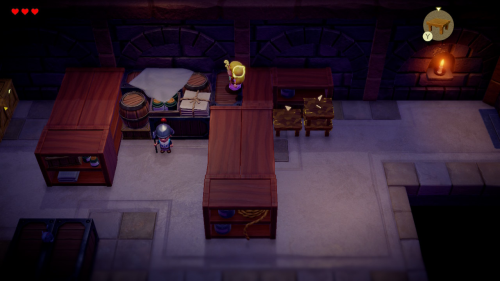

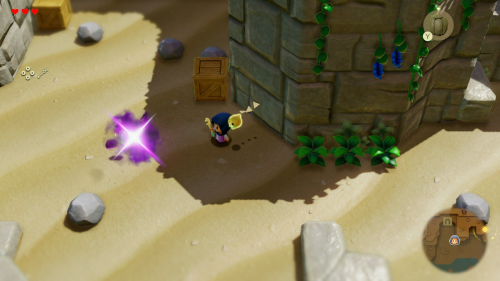
You'll now need to escape the castle while avoiding being caught by the guards. To avoid this first guard, you can build some stairs with your table echo to get on top of the nearby shelves. Remember that you can stack echoes on top of each other. Drop down and use the Tri Rod on the wooden box to the left to learn the wooden-box echo.
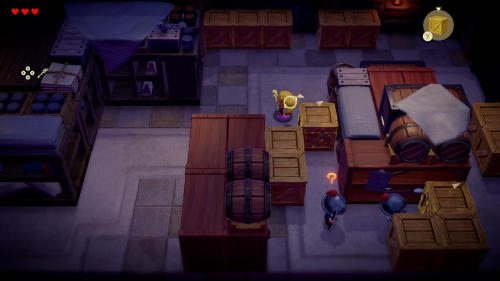

To get past the next couple guards, you can use your wooden-box echo to block their path and line of sight. You'll overhear some guards talking about distracting General Wright by throwing some pots, giving you a hint about how to distract some upcoming guards. Use the ladder to reach the upper shelves and then check out the nearby pots to learn the Hyrule-castle-pot echo.

You can then use pots to distract the nearby guards. Just throw the pots where you want the guards to go and then run in the other direction to get past them. In the next room you'll run into Impa, who luckily is on your side and does not believe the King that you created all these rifts. She suggests that you wear the cloak you picked up as a disguise.
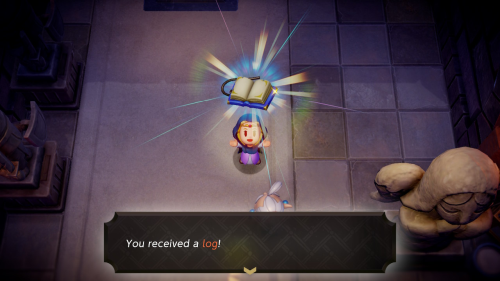

Some guards then approach and Impa makes quick work of them. She also gives you a Log. It contains a map that Impa marks the location of a house you should visit on. It also serves to track your main and side quests.

In the next room, check out the shrubs to learn the decorative-shrub echo. You'll see a ladder you can climb and many other shrubs in this room. You'll need to place two decorative shrubs to create a bridge that you can cross to the left. You'll then find a bed that you can use your Tri Rod on to learn the old-bed echo. You'll need to create a ladder by stacking these beds to make it to the exit on the left.

You'll find yourself outside in an area with some grass. You can use "R" to spin around and cut down this grass. You might find your first rupees by doing this. Afterward enter the well to find the Royal Family Shortcut. You'll now be in a 2D area where you can swim (note that you can only hold your breath for a limited time). Continue to the left and place one of your echoes when you get to a ledge that you can get up with a normal jump.
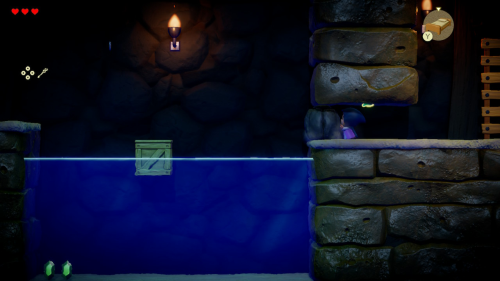

You'll soon find a boulder echo that you can learn. This boulder can be pushed into the water and then you can use wooden box echoes to get across the water to the other ledge. When you get to the three boxes blocking your way into the water, place a boulder on one to make it sink down. You can then swim all the way out of the 2D area.

Head up the stairs in this pool of water and you will be stopped by a rift appearing. The rift will then begin to grow and you'll need to escape by jumping into the stream of water to the right. The current will take you all the way to a cave far away from Hyrule Castle.
Suthorn Beach

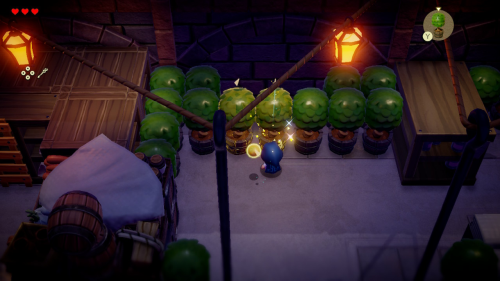
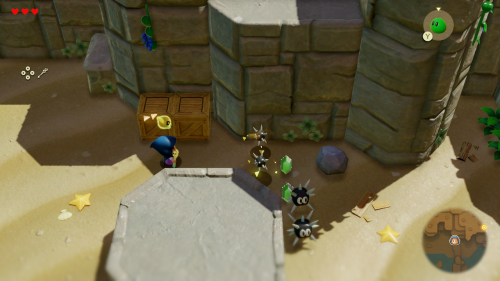
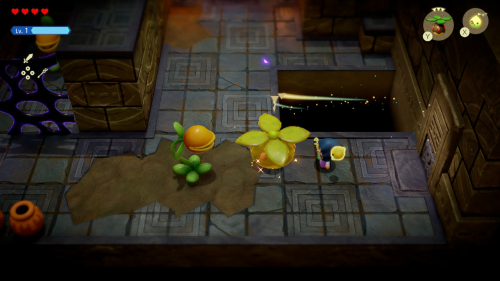
The first thing to do on this beach is learn the rock echo. Head south to the next area where you'll encounter your first enemy as Zelda: a Zol. Pick up a nearby rock and throw it to defeat it. Once an enemy is defeated you can learn their echo, so make sure to learn the Zol echo.

After learning this echo, you can summon Zol echoes to fight for you and attack other enemies. Do this or use rocks to defeat the rest of the Zol on the beach. You can explore the waters to the south and dive down to find some rupees.

Further to the right you will find Sea Urchin enemies. You can defeat them by tossing rocks. Afterward you will learn the Sea Urchin echo. Just to the north of this you will spot a treasure chest on a cliff. You can get on the left ledge using a bed echo. You can then replace it with a box and then stack two more beds to create a ladder to reach the chest. Open it to find 20 rupees.
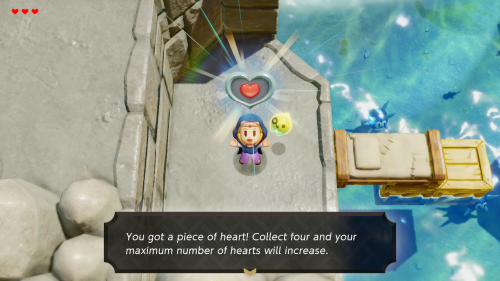

In the sea to the south you can create a bridge to the left using box and bed echoes to reach Piece of Heart #1. Collecting four of these will give you a heart container, increasing your health by one. You can then return to the platform in the water and use box and bed echoes to reach the higher platforms to the north where the bridge is out.

In this 2D Beach Cave area you'll come across a Keese enemy. Kill it with a rock and then learn the Keese echo.

Futher to the right you'll see a heart piece blocked off by three boxes. To destroy the boxes, you'll need to climb up to the higher ledge and drop a boulder echo on them. You can then clear the boulder and repeat the process two more times to break all three boxes and clear a path to reach Piece of Heart #2. You can then continue to the right to exit the cave.
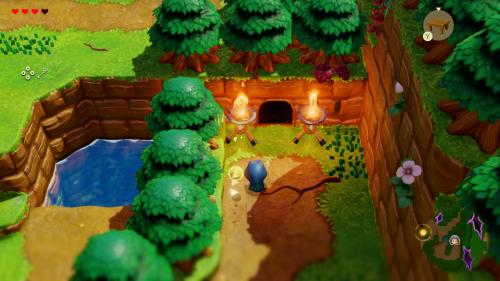
Suthorn Village

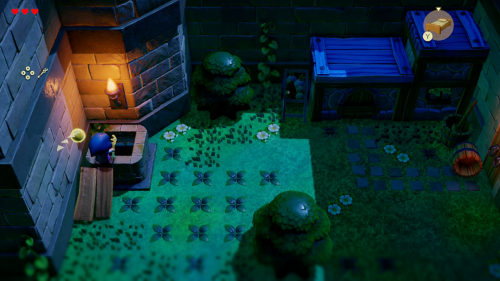
Back outside, you will find a small ledge to the left. You can use a table stacked on a bed echo to reach the chest above. Inside you will find 50 rupees. Continue to the right to find yourself in Suthorn Village. Enter the first house on the left and check out the fireplace to learn the meat echo.

You can talk to the villagers in this town to learn about the rift to the north that is cutting them off from Hyrule Castle. As it turns out, this is also the village that Link is from. In the center of town you can learn the trampoline echo. which serves as a platform you can jump on to get extra height. In the north west corner of town you can enter Link's house and learn the pot echo.
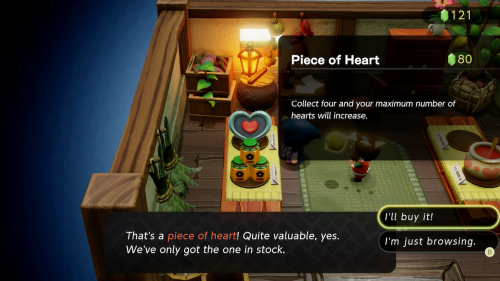

You can enter the shop in the north east corner of town. There you can buy Piece of Heart #3 for 80 rupees. If you hop into the well in the center of town you can find a treasure chest containing 5 jars of floral nectar.
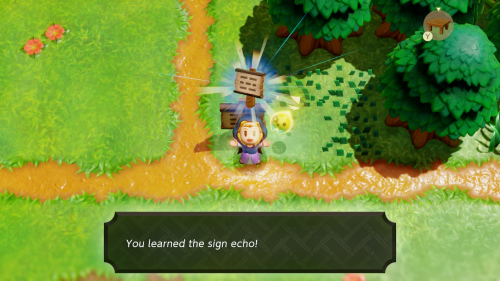

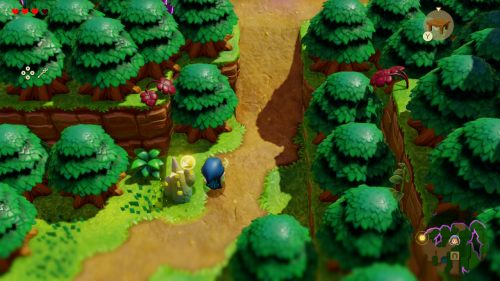
That's all there is to do in town for now, so exit to the east. If you go north you'll see that the path has been cut off by a rift. If you check out the sign you'll see that Suthorn Forest is to the east, that's where you want to go. But you can also learn the sign echo. East of the sign Tri will point out a waypoint. Once activated, you can warp to these waypoints using the map.
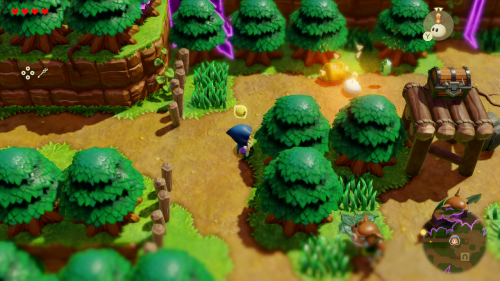
Suthorn Forest

In the forest there are many Zols you'll need to defeat. Directly north you can cross the water using a bed echo to reach a chest containing 5 electro apples. There is ledge you can jump up to the right and a higher ledge you can see. Use a bed and a table to reach the higher ledge. On it you'll find a chest containing 20 rupees.


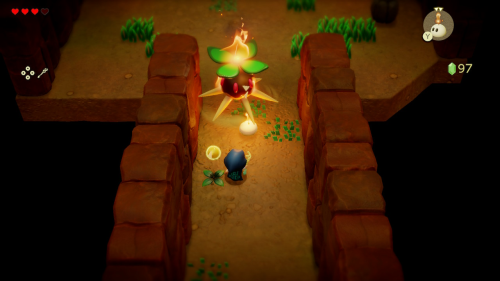
Head back to the main path. You'll find the entrance to a cave that is full of Zols. Clear them in the first room and continue to the end to find an Ignizol enemy. You can summon a Sea Urchin echo to defeat it. Then you can learn the Ignizol echo.

In the next room you can take out the Zol in the grass by lighting it on fire using the Ignizol. There is also a torch in the corner you can light with an Ignizol that will open the door. Inside the next room you'll find a chest containing a Fairy Bottle.
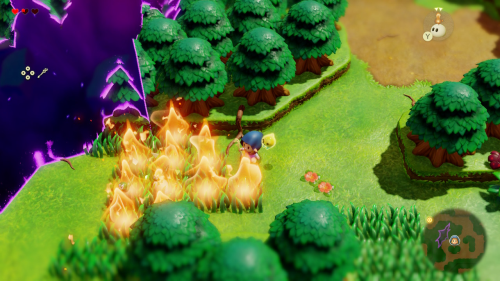

Exit the cave and continue to the right and you'll see some Rope (snake) enemies hiding in the grass. The easiest way to defeat them is to summon an Ignizol echo in the grass and burn everything in sight. Afterward make sure to learn the Rope echo. Continue to the north and enter the cave.
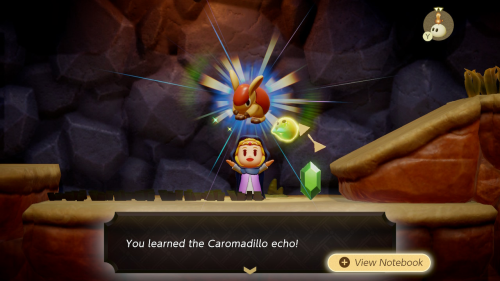

This is a 2D cave and you'll see an enticing heart piece to the right. Go left down the ladder and you'll see a Caromadillo enemy waiting to ambush you. Place an Ignizol or Sea Urchin down to defeat it. You can then learn the Caromadillo echo. You can then use your new echo to destory the boxes to the right and clear the path.

There is another Caromadillo waiting to ambush you from above. Bait it out and then throw another enemy echo down to defeat it. Use the rocks to climb up to the left and collect Piece of Heart #4. If you've been following along this means that you'll have a full heart container, permanently adding one heart to your health. Exit the cave.

In the area to the left you'll see a Spear Moblin enemy. You can defeat it with a series of Caromadillo or Ignizol echoes. Afterward you'll learn the Spear Moblin echo. Continue along and you'll see a fairy floating above some water. You don't need to manually capture them in this game, if you encounter one it will be automatically scooped up into an empty bottle if you have one. As always, a fairy will automatically revive you if you run out of hearts.
You may notice that we are approaching the marker on your map. Continue northwest to find it. However, the marked house has been partially swallowed up by a rift. Tri suggests that they can mend rifts with the help of their friends, but their friends seem to be missing. You'll then be guided to the northeast towards Suthorn Ruins.

Follow this path and you'll find a few Spear Moblins surrounding a locked chest. You'll see that one of them is munching on some meat, giving you a hint that you can use a meat echo to distract them. Once they are distracted by meat, you can send an echo like an Ignizol out to defeat them. Once they are all defeated the chest will be unlocked. You can reach it on the platform by placing a bed, hopping on it, placing a table on top, hopping on that, and the placing a wooden box next to you. Inside the chest you'll find 10 bunches of refreshing grapes.

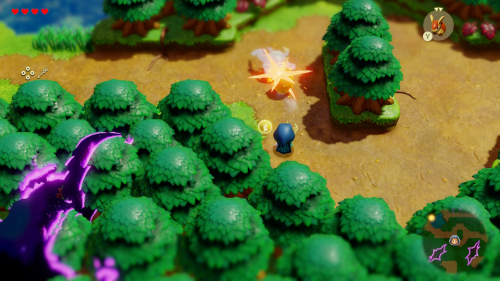
To the right you'll see a spot where you can hop off this cliff onto another path. Take this path, defeating the Spear Moblin along the way, and you'll see a cave entrance. Before entering it you can learn the brazier echo from one of the torches next to the entrance.

Inside the cave you'll find a Peahat enemy, which you'll want to keep your distance from. You can defeat it with an Ignizol and then learn the Peahat echo. That's all there was to do in the cave, so exit and make your way back to the main path. You can build a staircase from three tables to get back to the higher section.

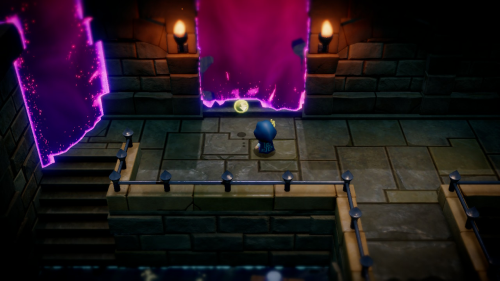
Along the way on this path you'll find another waypoint that you should activate. You'll then see a huge rift area along with a little ripple where you can enter. Tri says their friends are in there, and creates an opening for you to enter.
Stilled Suthorn Forest
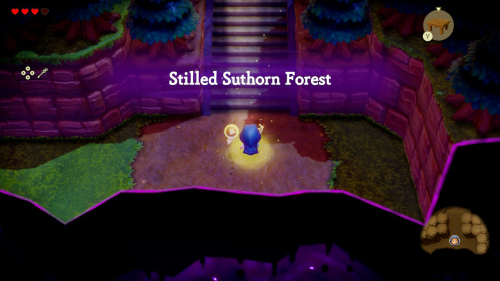

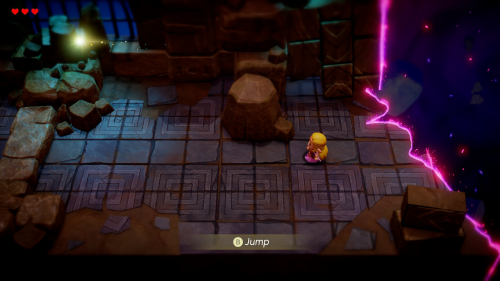
Inside the rift, you'll find yourself in Stilled Suthorn Forest, a part of the Still World. This is where you'll find everything that has been pulled into this rift. Jump along the platforms in this area and you'll eventually come across a shadow blob. When one of these touches you, it will spawn random shadow enemies. You can try out your new Peahat to defeat them.

Jump on the trees to the right and you'll see a person who has been pulled into the rift and is now petrified. Enter the cave entrance. Defeat the shadow Keese in this room and then place something heavy like a wooden box on the switch to the right to open the door. In the next room you'll see many shadow blobs that can best be taken care of with a Peahat or well placed Caromadillo. Head up the stairs to exit this cave to a new area.


Head to the left and jump across to find a ladder down into a small 2D area. Defeat the Spear Moblin here and then open the chest to find 50 rupees. You'll notice an even higher platform to the left after exiting the small cave. You can use a trampoline to get on top of the tree and create a bed ladder from here to reach it. You'll find a chest containing 20 rupees.

The path to the right leads to a small platform where you'll find 5 rupees. You can create a bed ladder to reach it. To progress take the northwest path where you'll find a petrified Minister Lefte. Continue straight ahead and you'll enter the first dungeon of the game, Suthorn Ruins.
Suthorn Ruins

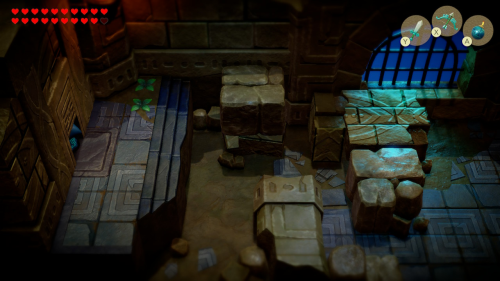
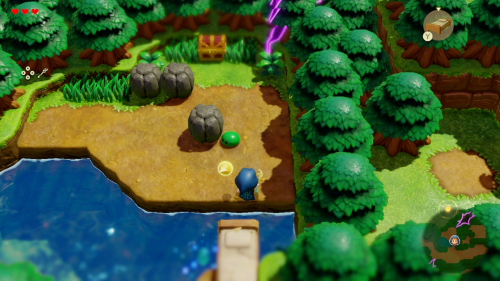
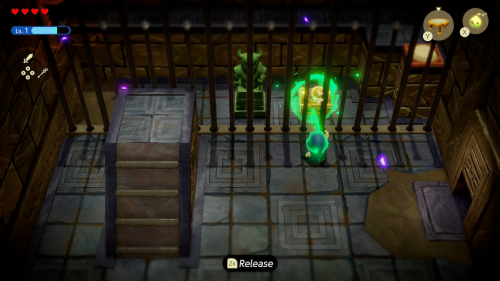
Activate the waypoint in this first room. In the next room, there is a giant boulder that you won't be able to get over. Investigate it instead and Tri will activate the Bind ability. This lets you bind objects or monsters to yourself so that they will automatically follow your movements. Use this on the giant boulder and move it to the right to clear a path forward. You can then step on the switch and continue to the next room.


Bind yourself to the giant boulder and move it to reveal a ladder down to another room. Place the giant boulder in the gap next to the ramp to create another path to the left. Check out this left path first and you'll find a small room with a partially buried treasure chest. Use the bind ability on it to pull it out of the ground. Open it to find 5 portions of radiant butter.

Head down the ladder to a 2D cave. Inside you'll find some Strandtula enemies that create webs that you can hang from. Defeat them and you can learn the Strandtula echo. Use the Strandtula echo in this room to create webs that allow you to reach the treasure chest in the center. Inside you'll find the dungeon map. You can then exit the cave to the right using a web.


In this room you can use a trampoline to get up to the higher platform and then create a bed ladder to reach the left side. You may recognize this next room, this was the room of the dungeon that Link was in at the beginning of the game. This is the same dungeon, but some things are a little different now that it has been pulled into the Still World. Walk ahead and use the elevator to reach the second floor.
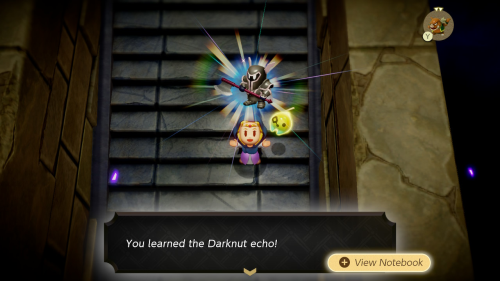

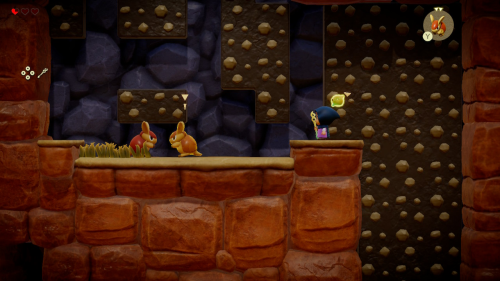
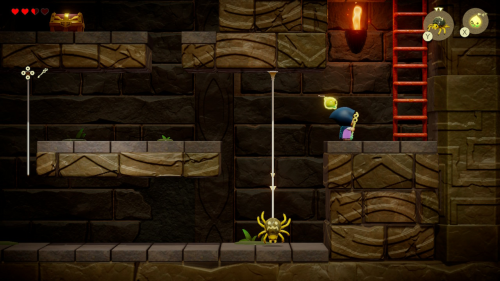
Further ahead past the staircase you'll find a Darknut enemy. You can use a Spear Moblin echo to defeat it. You can then learn the Darknut echo. Use a trampoline to reach the staircase to the left and enter the next room. Head down the ladder into another 2D cave.

You'll need to light all the torches using an Ignizol echo in this room to progress. You can summon Strandtula echoes and use their webs to get over the obstacles. When you exit the cave you'll find another waypoint. You'll notice one of the statues in this room is holding a shield. Use a bed echo to get close to it and then bind to the shield to pull it away. This will open the door ahead.
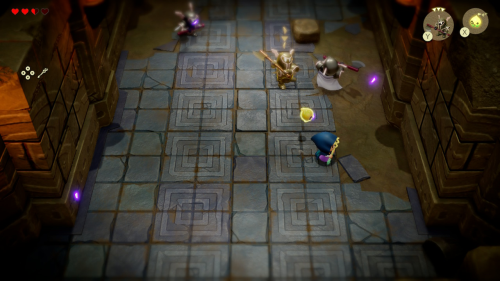

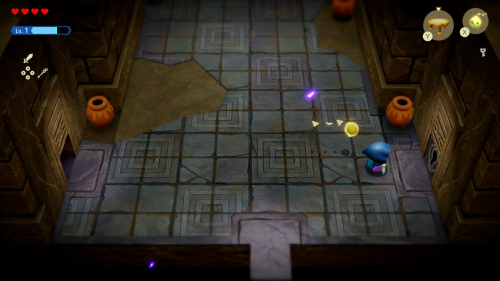
In the next room there are a few enemies to defeat. You can take out the Keese with an Ignizol and the Darknuts with a Darknut of your own. On the left side of the room you can build a bed ladder topped with a trampoline to get on the large pile of rubble. From there you can build another bed ladder to reach the chest containing 50 rupees.
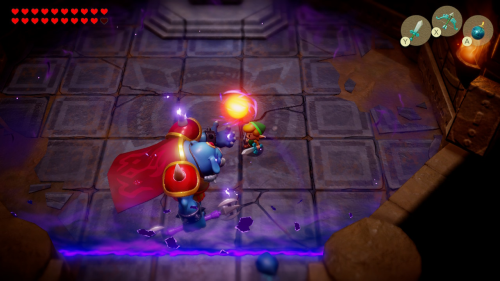
Miniboss - Shadow Link

Fill up on hearts by breaking the pots and then walk up the staircase for a mini-boss fight. We successfully found Link, but he too has turned evil after being pulled into the Still World. The key here is to distract Link and force him to look in one direction while attacking him from behind. You can either distract him yourself and let your echoes attack from behind, or you can have them distract and throw things at him from behind.

The Peahat echo is a great option as it will naturally float above and behind to attack. If you don't have the Peahat, a combination of a Spear Moblin and Rope can also work. After taking several hits, Link will transition to a second phase where he can use a spin attack. This can take out echoes more quickly but the strategy to defeat him in this phase is the same.
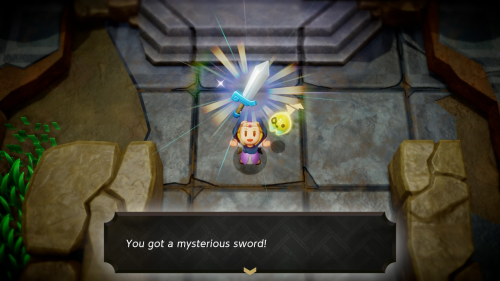

After you defeat Link, he will leave behind the mysterious sword. You can now press up on the d-pad to enter swordfighter form. This lets you temporarily become an echo of Link, using his sword, shield, and higher jump. Being in this form depletes an energy gauge that you can refill with blue blobs of energy that you can now find floating around. Make sure to cut the goo blocking the door ahead while in this form.


Head down the ladder into a 2D area. You can use a Strandtula echo to create a web and reach the chest to the right. Open it to get a Heart Pin. This is a type of equipment that you can now equip. You can wear different equipment to get bonus affects. In this case, hearts will appear more often. Below this you'll see a large boulder blocking the path. Use the bind ability to move it to the left and then climb up the ladder and jump on to it to get past it. Climb down the ladder back to the first floor.

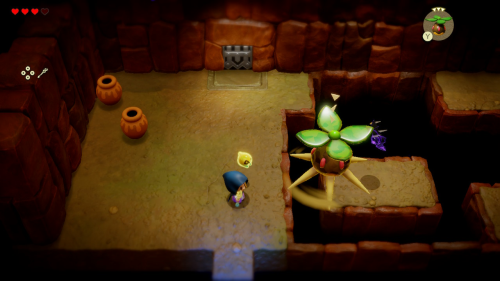
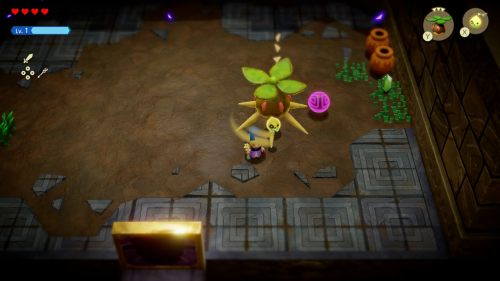
Enter the next room and activate the waypoint. You'll see the boss door here, but we'll need to find the a special key to unlock it. Enter the room on the left and defeat the Deku Baba enemy, a Peahat works very well. Afterward you can learn the Deku Baba echo. There are two other Deku Babas you'll need to defeat to open the doors in this room. In the top left corner you can use some trampolines to reach one. To the left you'll need to use swordfighter form to slice through the goo and kill the plant.

Take the door to the left where you'll see a treasure chest behind some bars. Bind to the chest and the walk up the ramp to raise the chest higher. From here you can guide it on to the switch to the right to lower the bars. You can then drop it to the lower ground and open it for 50 rupees.


In the room to the north you will find Deku Baba behind a gate that you seemingly can't get to. However, you can use the bind ability on it and pull backwards to rip off its head and kill it. Pretty brutal. A chest will then spawn and you can open it to get a small key. Head back to the right and use it on the locked door.

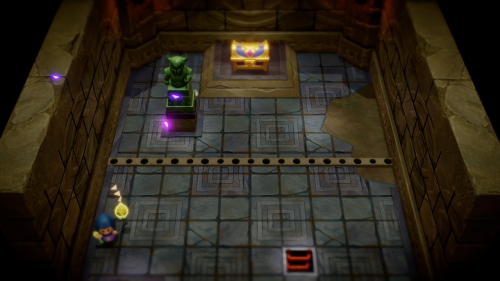
There are four statues in this room that you'll want to line up in a square pattern. Bind to the statue on the right behind the bars so that you can place it on the green square on the floor. You'll have to back up and gain some more distance when binding so that you can move it backwards.
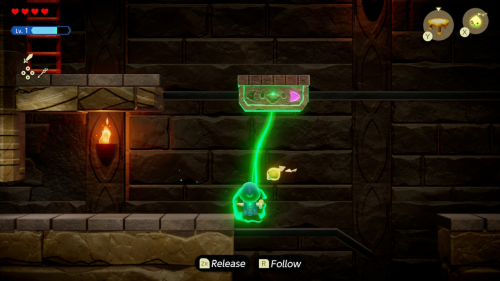

Head down the ladder and across the moving platform in this sublevel. In the next room there's a moving platform above you and Tri will teach you a new trick: you can bind to an object or enemy and then hold "R" to follow it's movements rather than have it follow yours. Use this trick to float across the gap to the right. Use this same trick on the moving platforms to get to the top of this sublevel. At the end you can just build a bed ladder to the right to get to the chest for 20 rupees.

You'll emerge in a room with a large chest behind some bars. Bind to the statue and use the small ledge that the chest is on to raise it a little higher. You can then jump when you are near the switch to place the statue on it. This lowers the bars and you can open the chest to find the big key. Exit to the south and you'll be back in the room to the right of the boss door. Head back left and use the pots in this room to fill up on health if needed.
Boss - Seismic Talus
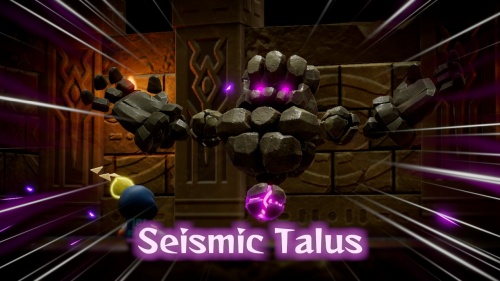

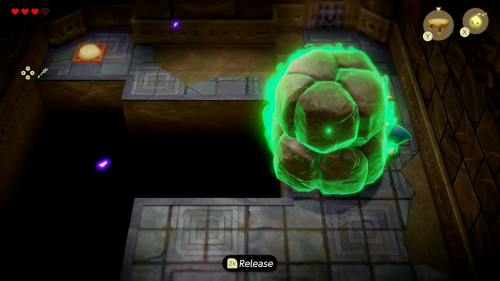
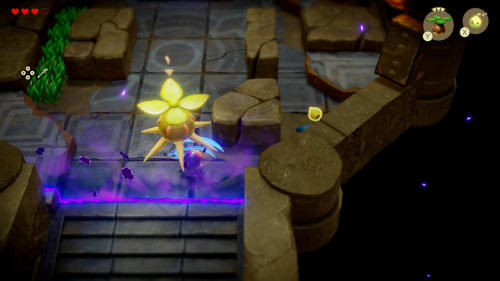
Enter through the boss door to find yourself in an arena with the first boss of the game: Stone Talus. This guy is made of rock so most attacks will not be effective against him. The key is to bind to the glowing purple stone and pull it away from the rest of his body. After you do, you'll have a brief window to damage the stone. You can summon an echo like a Peahat to damage it or use swordfighter form. Or both. The glowing stone can move from below him to next to his arms, and you'll have to wait for him to lower his arm or put his hands out for you to be able to reach it.

After a few cycles of this the Stone Talus will turn a darker color and enter phase 2. His attacks are a little faster now. He also will keep his purple stone in his head, so the only time you'll be able to bind to it is when he lowers his head after slamming his hands down. Make sure to bind to it quickly and start pulling directly backwards, as it's stuck in his head pretty well. Just continue to slash at it once it's loosened until the Stone Talus is defeated.

After the boss battle you'll get a full Heart Container to increase your health. You will also have freed all of Tri's friends that were stuck here, allowing them to repair the rift. Tri will also increase to Lv. 2, allowing you to summon more echoes and use swordfighter form for longer. You'll also get 5 unusual crystals. Use the warp point to leave the Still World.
Continue to Central Hyrule
