
Echoes of Wisdom Bosses
The Legend of Zelda: Echoes of Wisdom features bosses at the end of every dungeon and several that can be found throughout the overworld in Hyrule. This Echoes of Wisdom Bosses Guide will guide you through how to beat every boss in Echoes of Wisdom. They are listed in a rough chronological order of when you will encounter them.
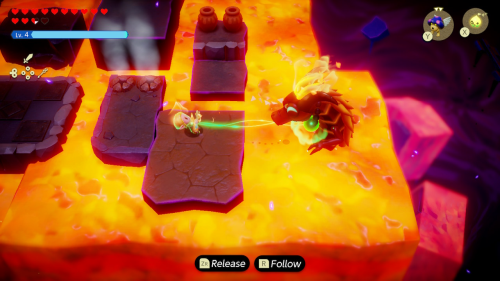
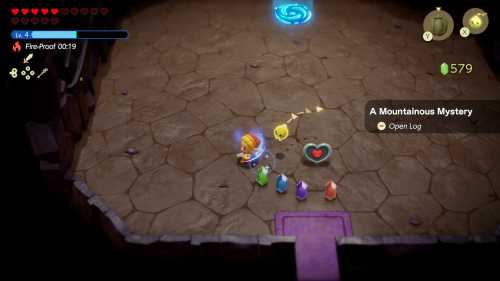
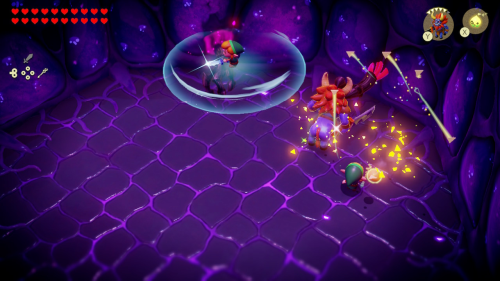
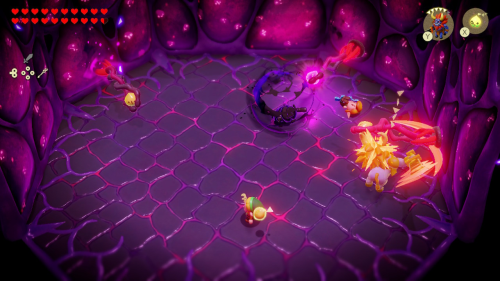
Suthorn Ruins Miniboss - Shadow Link
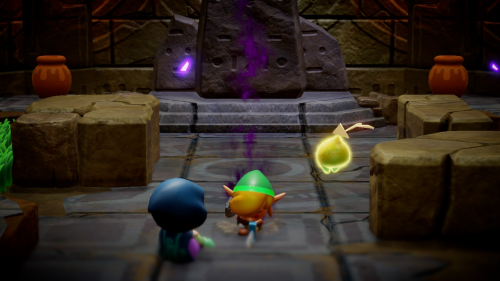
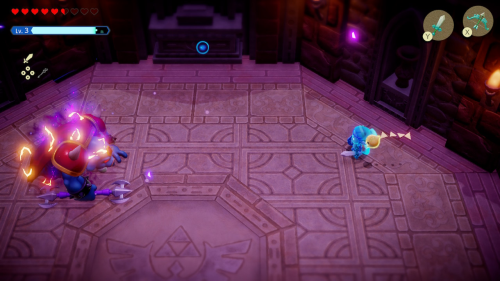
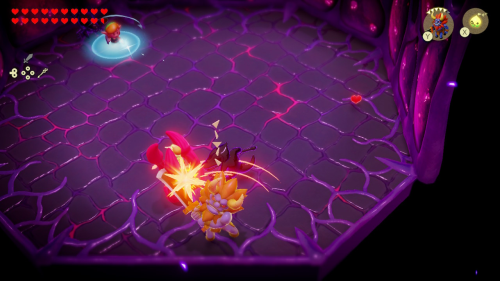
We successfully found Link, but he too has turned evil after being pulled into the Still World. The key here is to distract Link and force him to look in one direction while attacking him from behind. You can either distract him yourself and let your echoes attack from behind, or you can have them distract and throw things at him from behind.
The Peahat echo is a great option as it will naturally float above and behind to attack. If you don't have the Peahat, a combination of a Spear Moblin and Rope can also work. After taking several hits, Link will transition to a second phase where he can use a spin attack. This can take out echoes more quickly but the strategy to defeat him in this phase is the same.
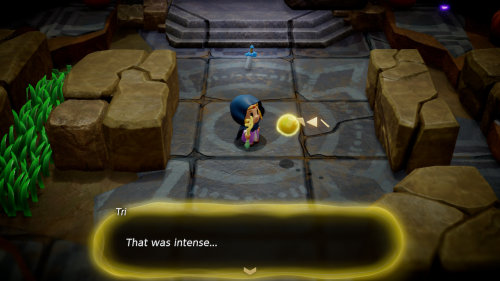
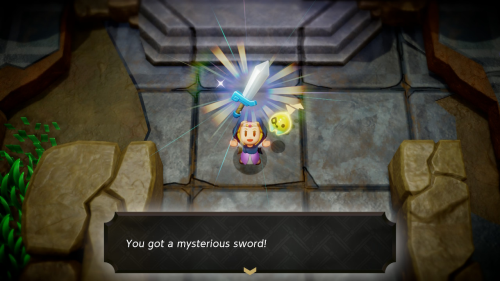
After you defeat Link, he will leave behind the mysterious sword. You can now press up on the d-pad to enter swordfighter form. This lets you temporarily become an echo of Link, using his sword, shield, and higher jump. Being in this form depletes an energy gauge that you can refill with blue blobs of energy that you can now find floating around.
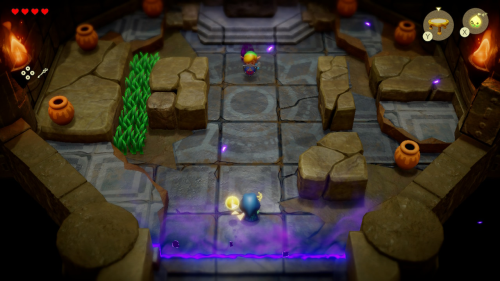
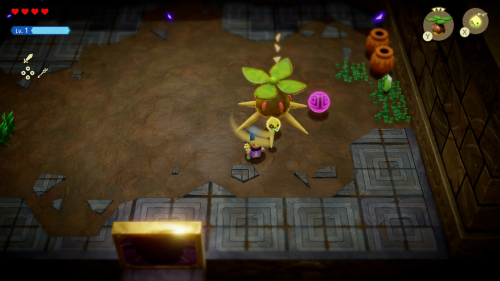
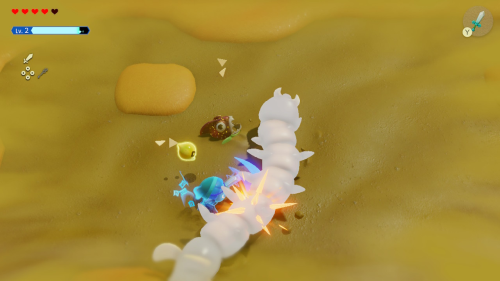
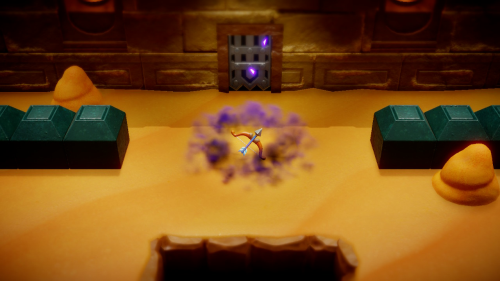
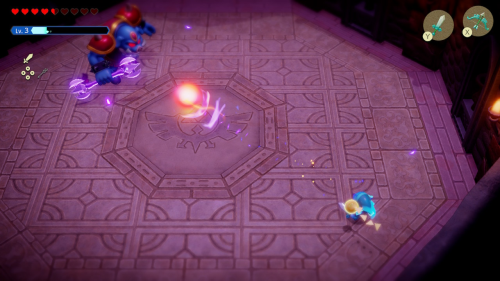
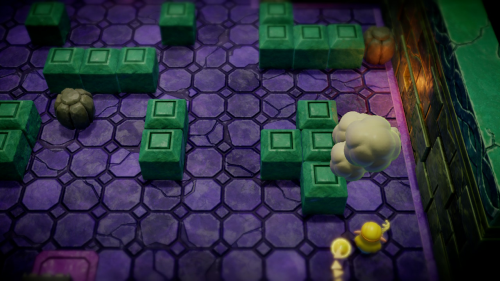
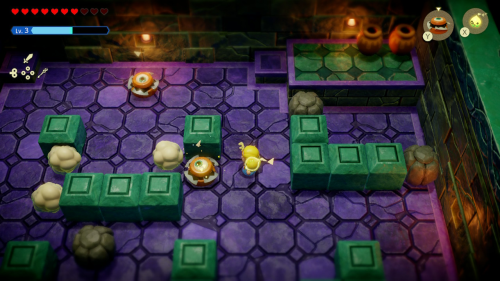
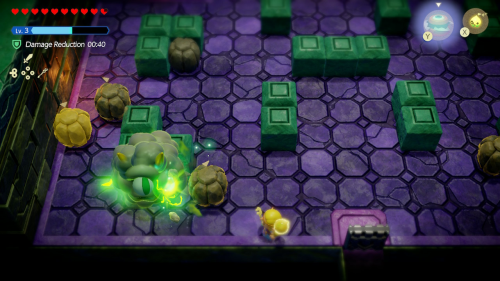
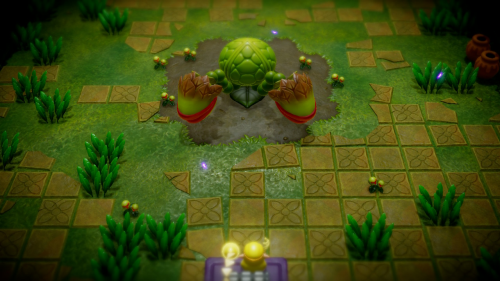
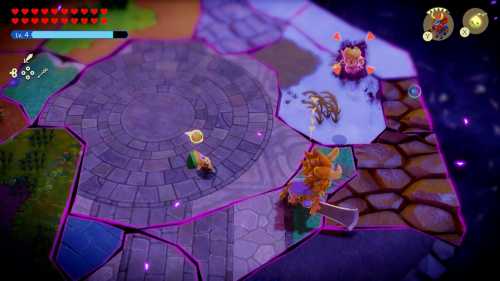
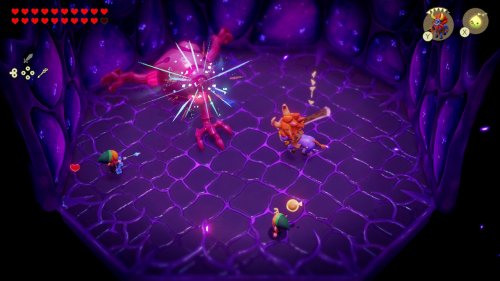
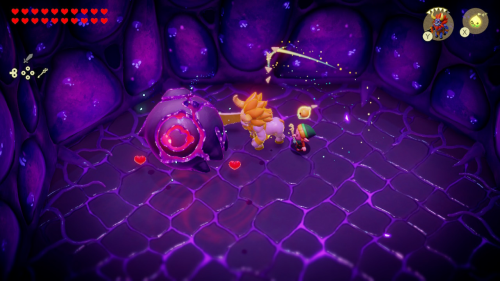
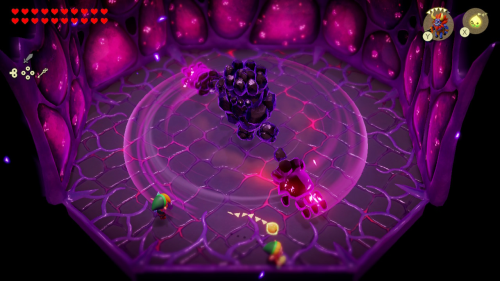
Suthorn Ruins Boss - Seismic Talus
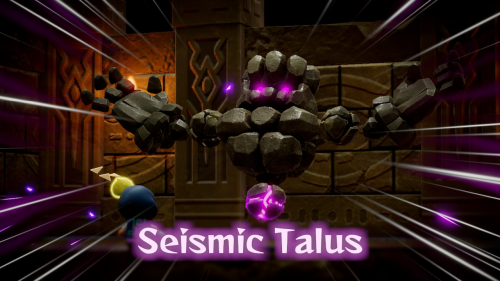
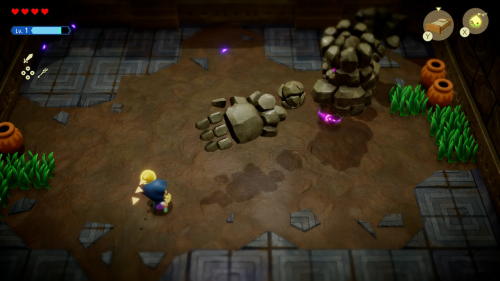
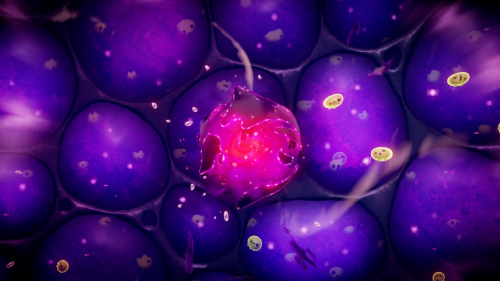
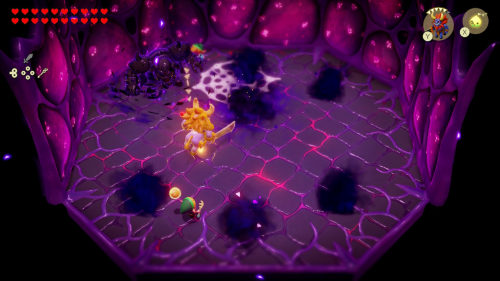
Enter through the boss door to find yourself in an arena with the first boss of the game: Stone Talus. This guy is made of rock so most attacks will not be effective against him. The key is to bind to the glowing purple stone and pull it away from the rest of his body. After you do, you'll have a brief window to damage the stone. You can summon an echo like a Peahat to damage it or use swordfighter form. Or both. The glowing stone can move from below him to next to his arms, and you'll have to wait for him to lower his arm or put his hands out for you to be able to reach it.
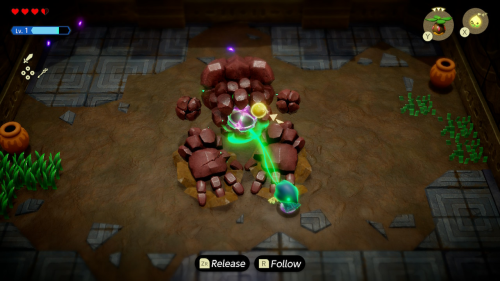
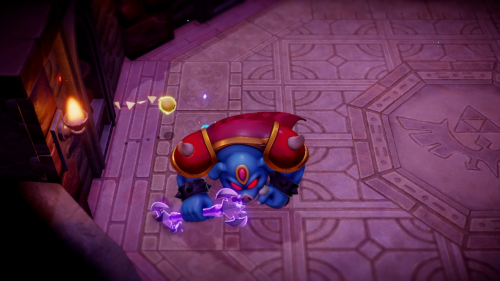
After a few cycles of this the Stone Talus will turn a darker color and enter phase 2. His attacks are a little faster now. He also will keep his purple stone in his head, so the only time you'll be able to bind to it is when he lowers his head after slamming his hands down. Make sure to bind to it quickly and start pulling directly backwards, as it's stuck in his head pretty well. Just continue to slash at it once it's loosened until the Stone Talus is defeated.
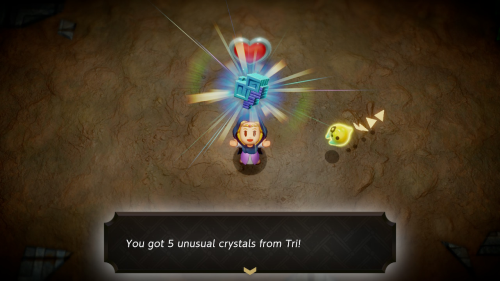
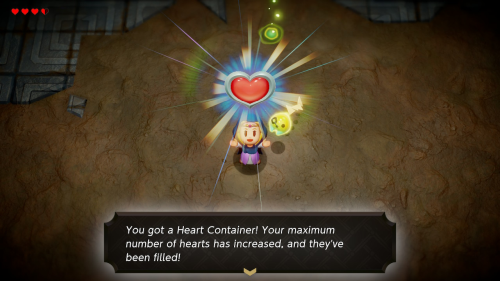
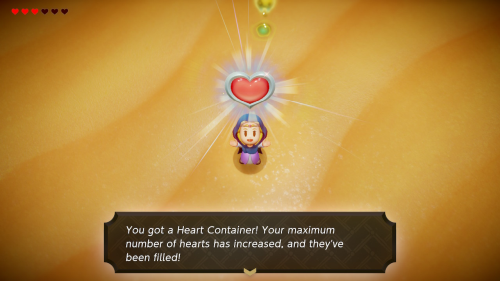
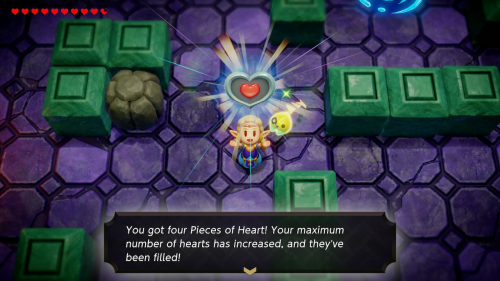
After the boss battle you'll get a full Heart Container to increase your health. You will also have freed all of Tri's friends that were stuck here, allowing them to repair the rift. Tri will also increase to Lv. 2, allowing you to summon more echoes and use swordfighter form for longer. You'll also get 5 unusual crystals.
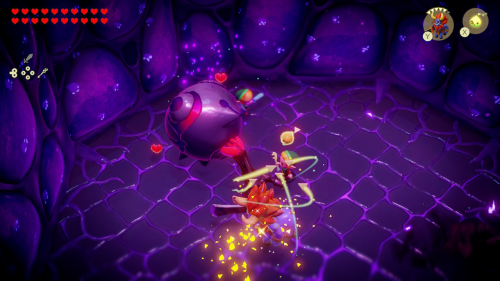
Gerudo Desert Miniboss - Lanmola

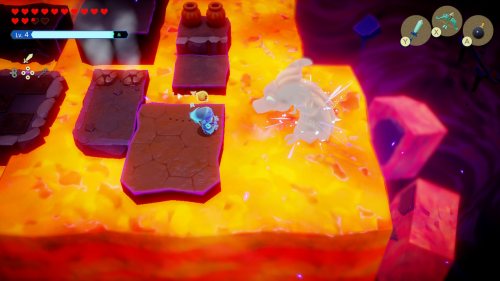
To the northwest of the Oasis in Gerudo Desert you'll find a Lanmola in the sandstorm. It's a sand worm that fights in a deep pit of sand. There are a couple platforms that you can safely stand on during the fight without sinking.
To defeat the Lanmola you'll need to wait for it to bury itself in the ground until only it's tail is sticking out and then bind yourself to the tail. You can then pull it out and expose its soft underbelly. You can then summon echoes and/or use swordfighter form to deal a lot of damage. There is no echo for defeating it but you will get many rupees and the sandstorm in the area will be cleared.
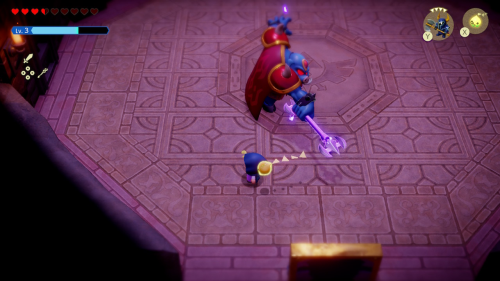
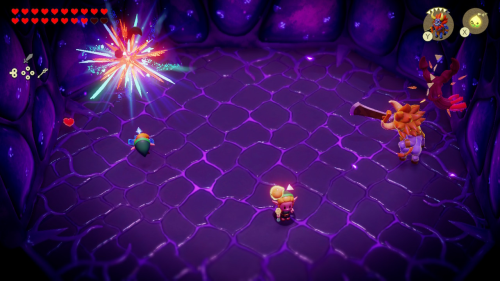
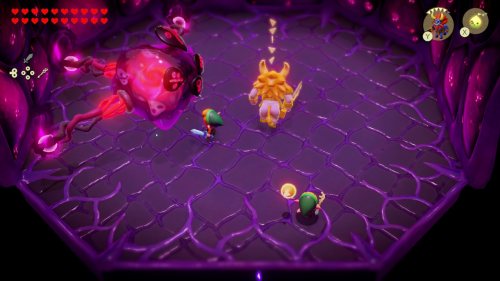
Gerudo Sanctum Miniboss - Shadow Link (Bow)
Just like in Suthorn Ruins, the miniboss of this dungeon is Shadow Link. This time around, he'll have a bow at his disposal. He can out manuever most of your echoes, so dealing damage in swordfighter form is your best bet. After dealing a few hits of damage, he will split into three.
The strategy for the second phase is the same as the first, you'll just have some more arrows to dodge. Each Shadow Link copy will only take two hits from your sword to defeat, it's just a matter of catching them. After he's been defeated you can pick up the Bow of Might. This is another weapon that you can use in swordfighter form.
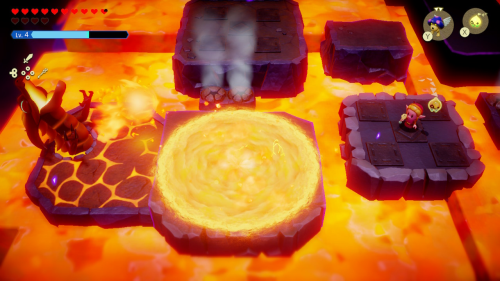
Gerudo Sanctum Boss - Mogryph

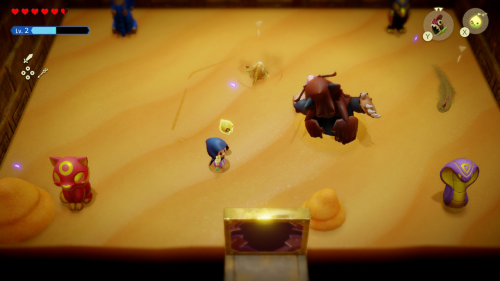
Mogryph is a giant mole monster who will burrow in the sand before exposing himself to attack. He attacks by swiping in the air, which will also cause a ripple in the sand that can damage you. You can avoid this by not standing directly in front of him. Spawn a couple Sand Piranha echoes as they can deal damage even while he is burrowed. Otherwise just wait until he exposes himself and use swordfighter form. You can also trick him into charging into a statue, which will stun him for awhile.
In phase two of the fight, Mogryph will create quicksand in parts of the arena. He'll also grow wings and begin to fly around, spawning large tornadoes to attack. You'll just want to avoid his attacks when he is flying around and wait for him to eventually come back down. When he does he'll do a charge attack after landing once. Place a statue in front of him when he charges to stun him and then wail on him in swordfighter form.
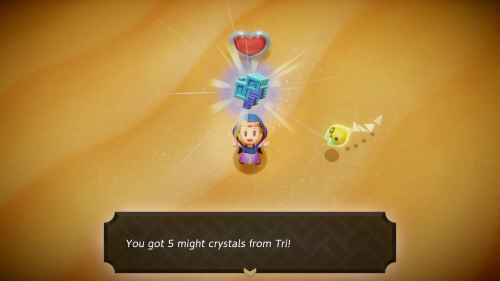
After repeating this process of stunning him by forcing him to run into statues a few times, Mogryph will be defeated. Defeating him will complete the dungeon and free Tri's friends, allowing him to power up. You will also get 5 Might Crystals and a Heart Container as a reward.
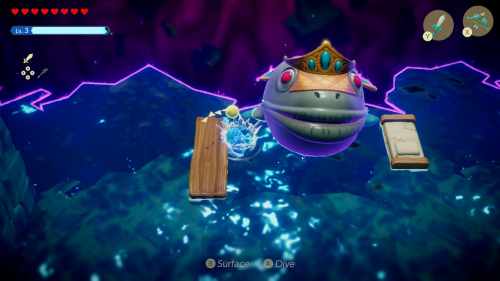
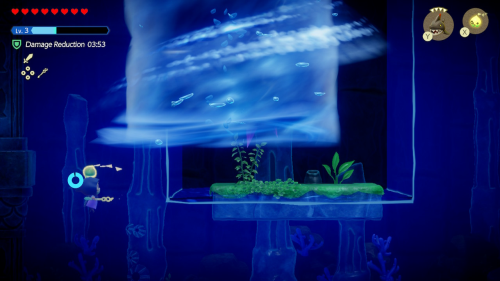
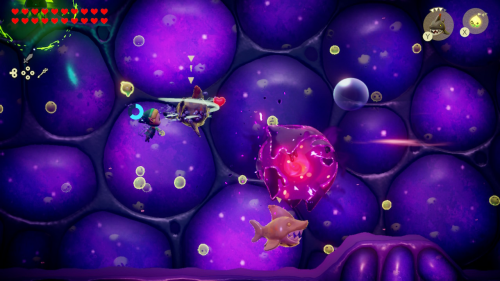
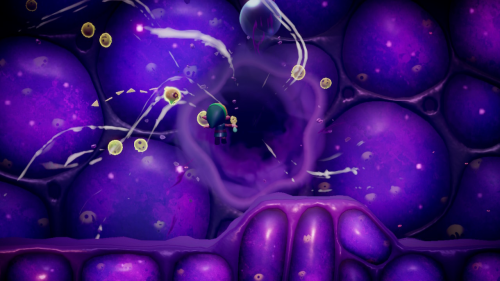
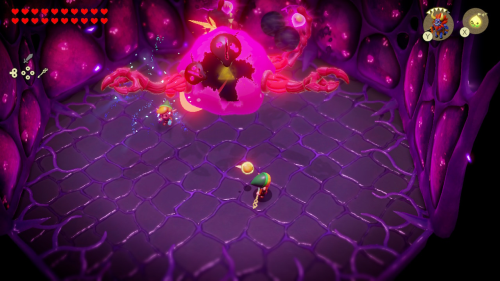
Jabul Waters Boss - Imposter Jabu-Jabu
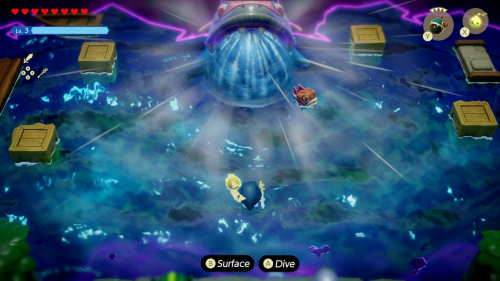
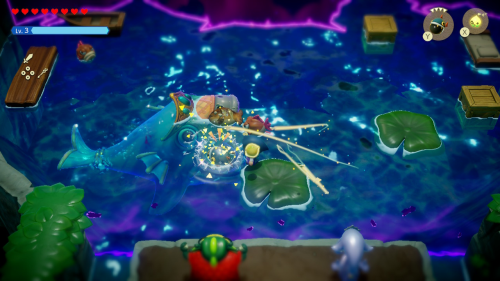
As soon as you enter the water, a wall will be put up behind you and you'll be trapped in the little arena with Imposter Jabu-Jabu. He will both inhale and expell water and various enemies and platforms that he's previously swallowed. He'll then swim around the arena chomping on anything in his path. While he's doing this, you'll just want to avoid him and summon Chompfin echoes to take out the smaller enemies.
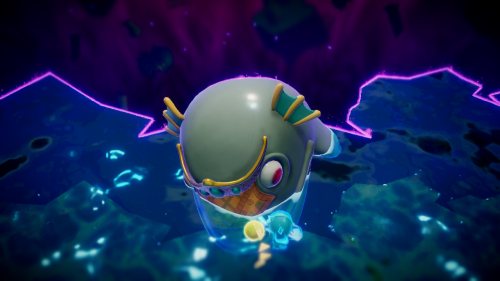
To deal damage, you'll want to wait until Jabu-Jabu begins to inhale and then place a Bombfish echo for him to swallow. Once it explodes it will stun him and then you can swing at him in Swordfighter form to deal damage. You'll simply need to repeat this process a few times. His second phase is the same as the first, but he'll be electrified and summon more smaller enemies.
Jabul Ruins Boss - Vocavor

You'll find yourself in a dark arena with the same fish creature, Vocavor, who created the Torpedo and chased us away before. Vocavor will summon more torpedos that you'll need to weave through to get close to him. Once he takes a little break you can use swordfighter form to swing at the armor on his back to break it. Once it's broken you can deal direct damage.

Vocavor can also attack by sending his tail spikes at you like homing missiles. Just try to avoid them and quickly make his way to his back to start swinging. After dealing enough damage Vocavor will remove some of the water around him, making it difficult to attack from above.
He will eventually summon a large torpedo that you'll need to avoid. After this attack he gets tired and floats upside down, letting you attack his weak point with a bow. If you don't have a bow yet, you can also summon various flying echoes to attack. After dealing enough damage Vocavor will be defeated and the room will be drained of water.
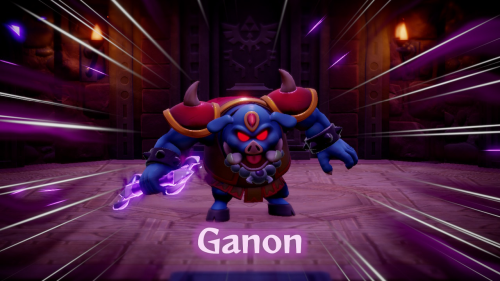
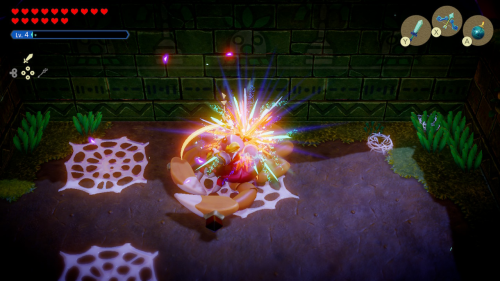
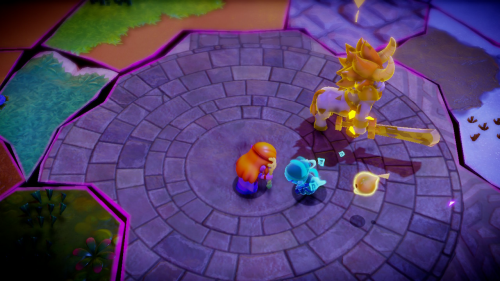
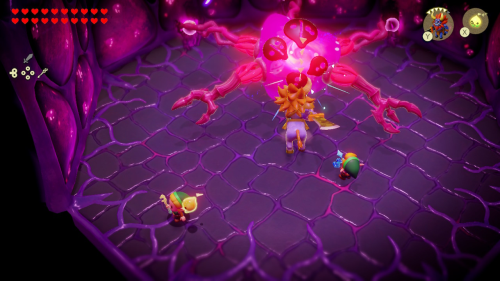
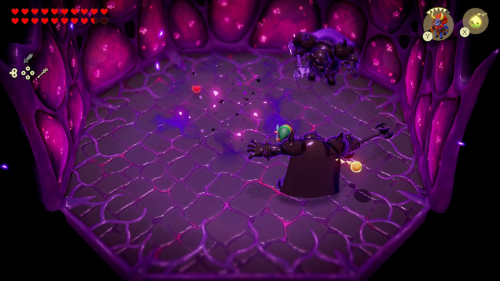
Hyrule Castle Boss - Shadow Ganon
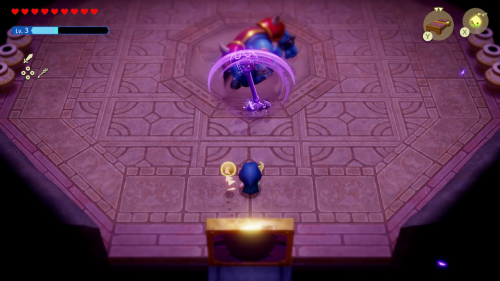
In the first phase of this battle, Ganon will block attacks from the front by spinning his weapon in front of him. He'll then quickly teleport and perform a lunging attack. If you dodge it, this leaves an opening for you to deal some damage in swordfighter form. You should also have a strong echo like a Lv. 2 Darknut summoned.
Once you deal enough damage, Ganon will enter the next phase where he'll start summoning his spinning weapon at a distance. He leaves himself vulnerable when does this, but he also summons Fire Keese that can get in the way and take out your echoes. If you start running low on energy, you can slowly gather some that spawns along the edge of the ring.
In the third phase, Ganon will start summong Fire Keese much more quickly. He'll also summon his classic energy orb that you'll need to volley with him by timing your sword swings as it approaches. He'll eventually lose the volley and will be stunned for awhile so you can get some more attacks in. You'll have to repeat this volley process a couple times before the next phase.
In the fourth phase and final phase, Ganon will continue doing all the same moves, but even faster. He'll cycle through is normal moves and starting a volley with the energy orb. Make sure to gather enough energy to volley with him. If you are having trouble with the speed, make sure to start the volley when you are further away to give yourself some more time. After dealing enough damage in this phase, Ganon will be defeated.
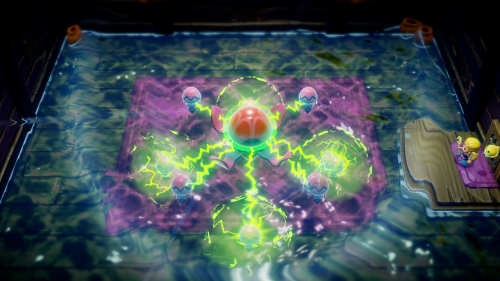
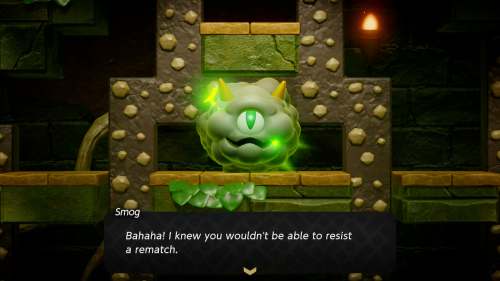
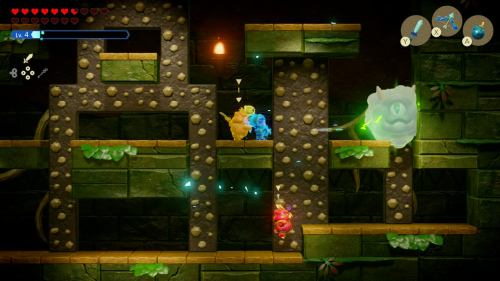
Eastern Temple Boss - Smog
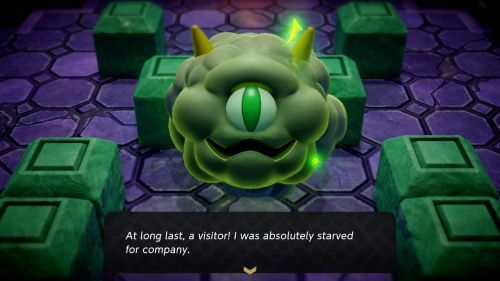
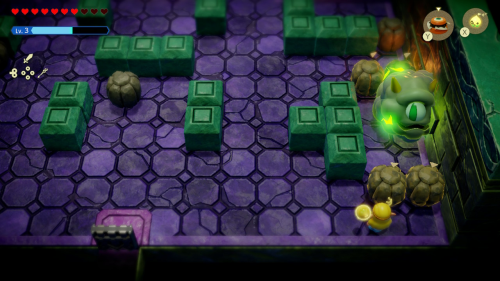
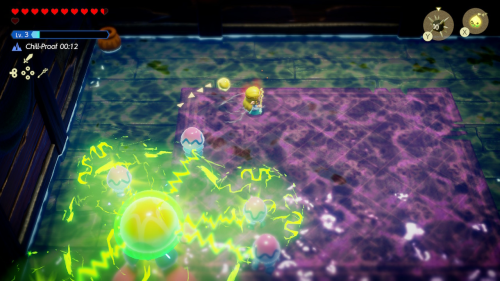
Smog is a large electric cloud creature who has been causing trouble in the Eastern Temple. In the first phase of the battle, he will move all around the room and shoot orbs of electricity at you. The key here is to use some boulders to trap him in a small corner. You can then attack him with some echoes like Pathblades while he is trapped.
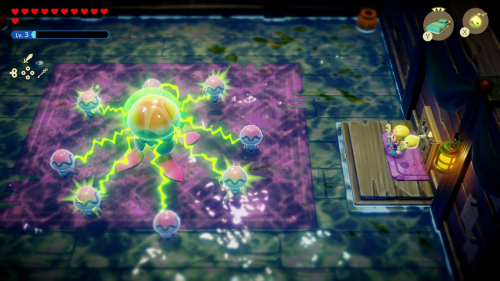
In the second phase, Smog will split into several smaller clouds that you won't be able to damage. You'll need to trap these clouds in a small area so that they all touch each other and combine back into the larger form of Smog. From here you can repeat the same process as the first phase and damage him normally.
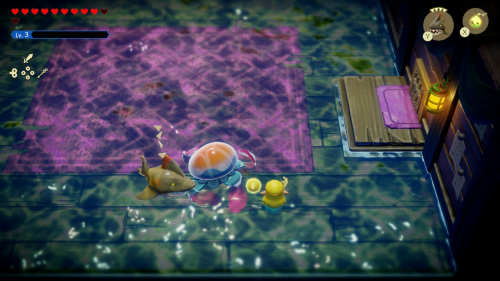
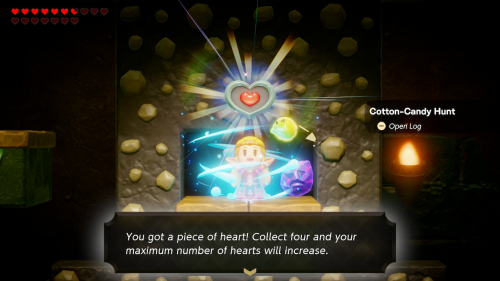
The third phase is very similar to the second, but Smog will be split into even more pieces. You'll ahve to wrangle them all up and combine them one by one. Once he is all put back together you can trap him in a corner and use Pathblades to finish him off. Once Smog has been defeated, he will leave many rupees and a Piece of Heart behind.
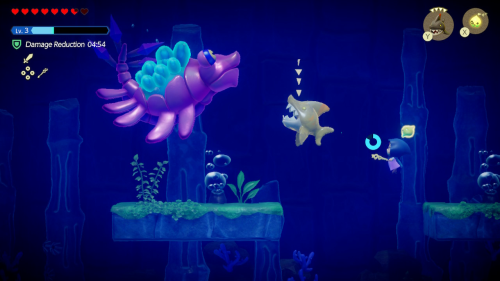
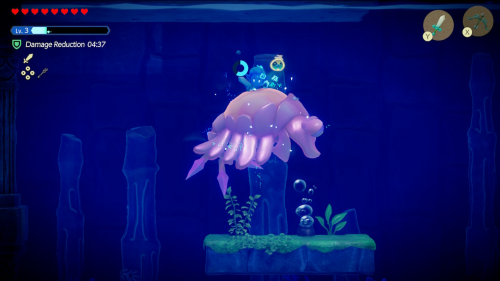
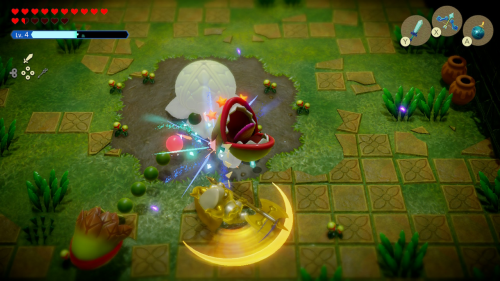
Wrecked Ship Boss - Barinade
If you've played Ocarina of Time, you might find that this boss looks rather familiar. It's an large electric jellyfish that spins smaller jellyfish (Biri) around it to protect itself. You'll need to first start by defeating all the surrounding Biri before you can attack Barinade. The easiest way to deal with the Biri is to summon Sea Urchins in their path. Once they have all been taken out, you'll have an opportunity to attack Barinade directly.
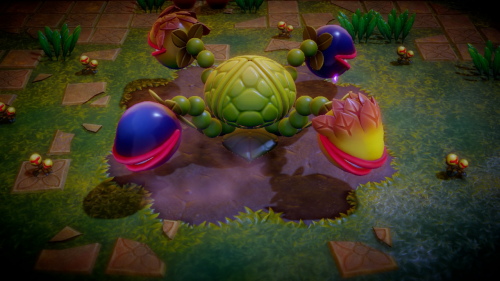
The second phase is similar to the first, but the Biri will spin more quickly and Barinade will use a powerful charge attack that covers a wide area. You'll see him charge up this attack for a few seconds, and this will give you time to take out a few Biri and then run away. Once all Biri have been cleared you can deal direct damage once again. Once Barinade is defeated he will drop many rupees and a Piece of Heart.
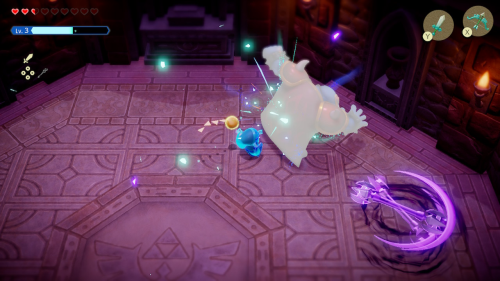
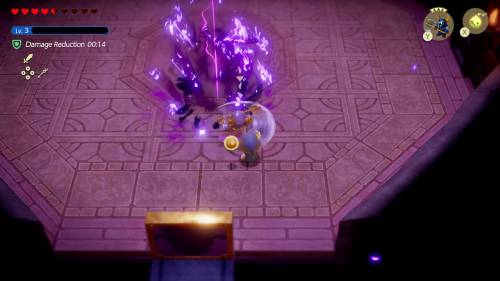
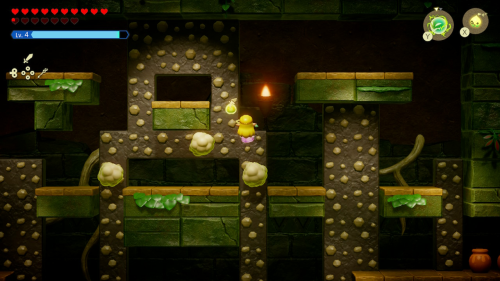
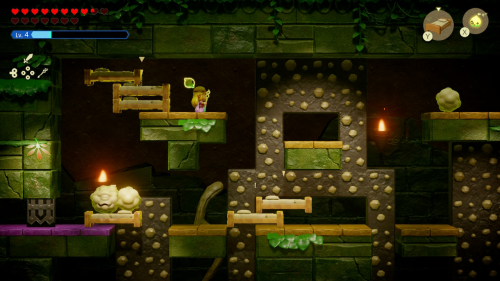
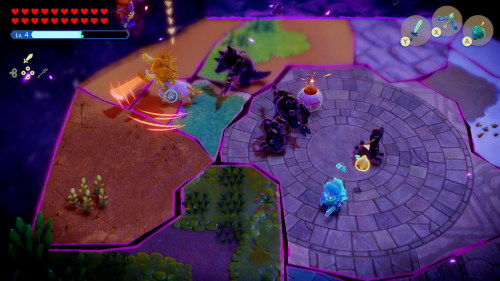
Eldin Temple Miniboss - Shadow Link (Bombs)
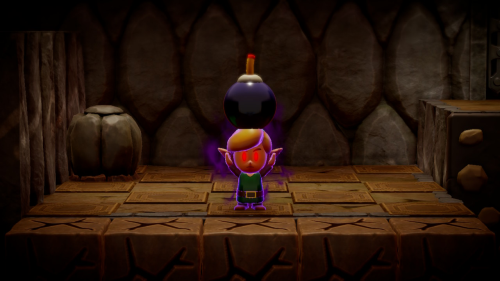
After going through the locked door, you'll be facing off against Shadow Link in a room full of cracked rocks. This time around his primary attack is tossing bombs at you. He'll pick up and toss normal bombs as well as bombchus, which can climb up walls.
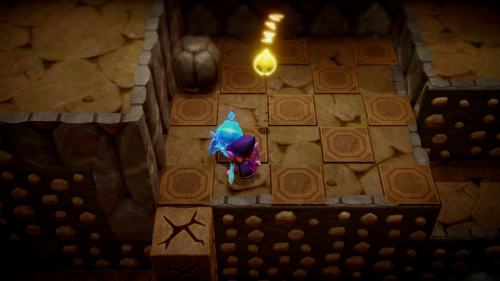
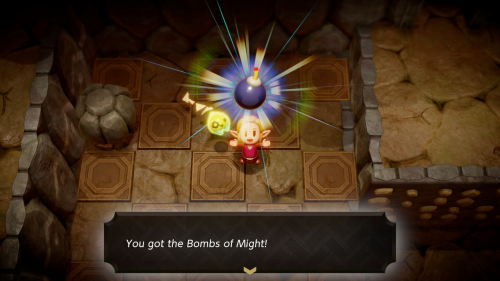
You can summon some echoes to help, but the key to this fight is to just chase him down while he's busy pulling a bomb and then wail on him in swordfighter form. If you have a fully upgraded sword, it won't take very many hits. He has a second form where he can throw three bombs at once, but the strategy too attack is the same. Once Shadow Link is defeated again he'll leave behind the Bombs of Might.
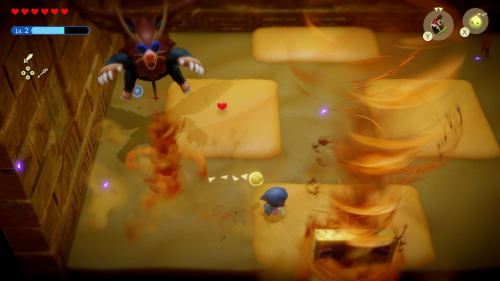
Eldin Temple Boss - Volvagia
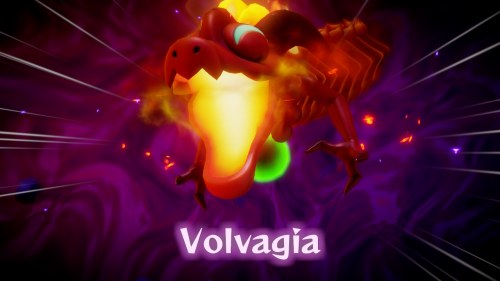
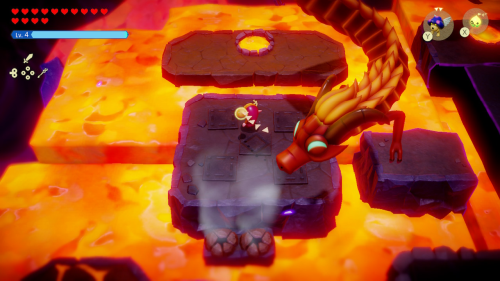
You'll need to drop down the hole to come face to face with this dungeon boss: Volvagia. Ocarina of Time players might find it very familiar. The battle will begin by Volvagia alternating between shooting fire balls at you and a giant green energy orb. You can't reflect either back, so you'll need to jump around the arena and dodge them.
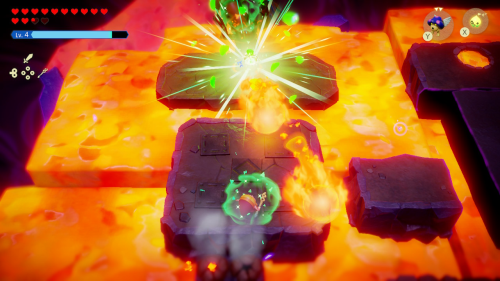
The best way to get an attack in of your own is to bind to the green necklace around Volvagia's neck that it summons orbs from. You can pull back on it to snap it and temporarily stun Volvagia, leaving an opportunity to get a bunch of hits in in swordfighter form.
Volvagia can also fly around the room to find a new spot to attack you from. If this spot is out in the open lava, you won't be able to get any sword slashes in after stunning it. However, you can still use your bow to get some good damage in.
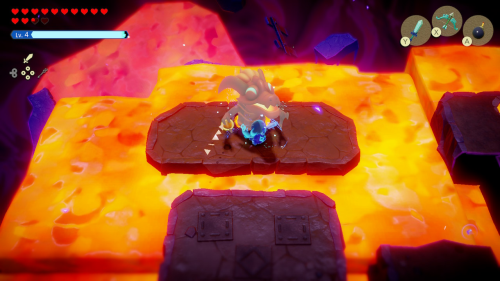
During Volvagia's second phase, it will fly around much faster and mostly stick to areas you can't reach with your sword. It also has a fire breathing attack that can heat up one of the platforms so that you can't stand on it. Besides that it's mostly a rinse and repeat of pulling on the necklace to stun it and dealing damage with your sword or arrows.
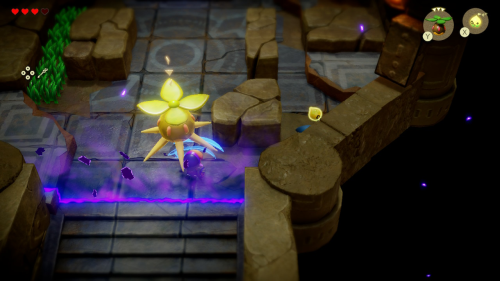
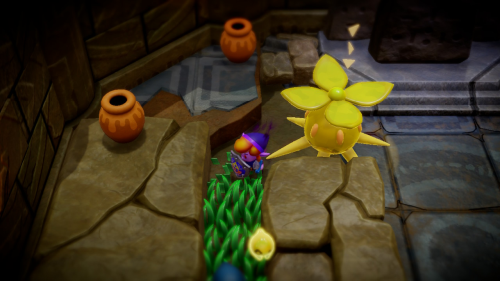
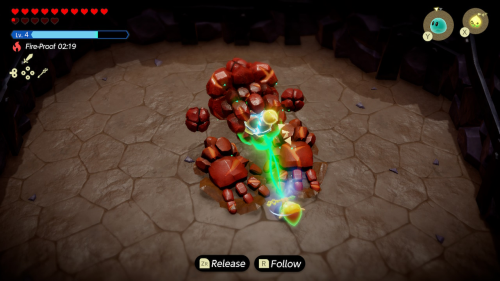
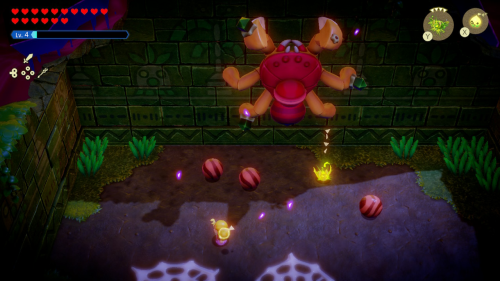
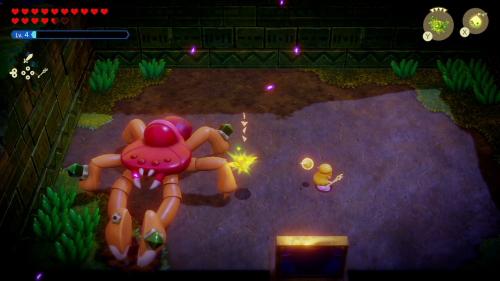
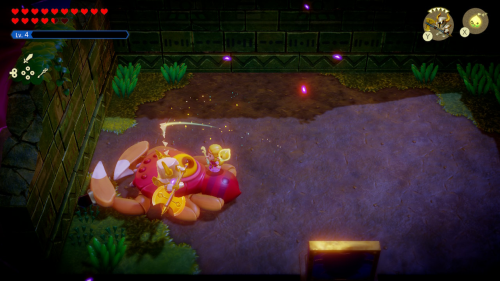
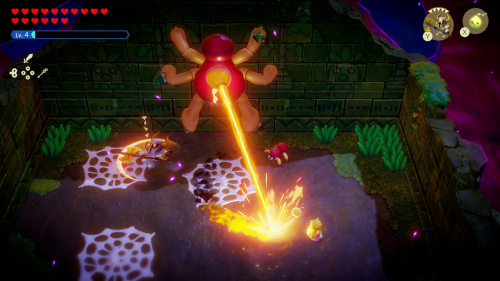
Summit Cave Boss - Flame Giant
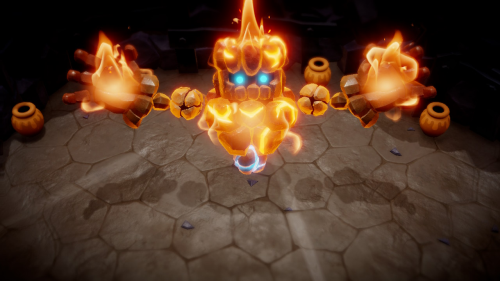

Enter the final room of Summit Cave to face the Flame Giant, who is very similar to the Seismic Talus boss we faced earlier - only he is covered in flames. The same tactic to deal damage still applies: you'll need to bind to the glowing blue orb and pull it from his body and then slash it in swordfighter form (or summon echoes) to deal damage.
The orb starts below him where you can just bind it. But as you deal more damage the orb will move to above his hands, in his head, and in his back. You'll need to stand on his hands to bind to the orb in some cases. For his back, you can summon a boulder and then bind to the orb.
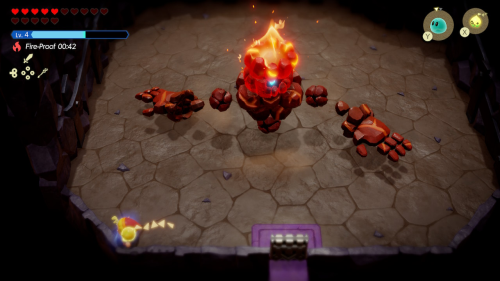
Standing on his hands may be challenging when they are covered in fire. However, you can use water echoes like the Hydrozol to put out the flames on different sections of his body. This will be necessary before you can pull the orb out during the second phase. The Flame Giant is also quicker than the Seismic Talus and has an extra spinning move, so be careful. Once you've done enough damage to the orb Flame Giant will be defeated and leave behind many rupees and a heart piece.
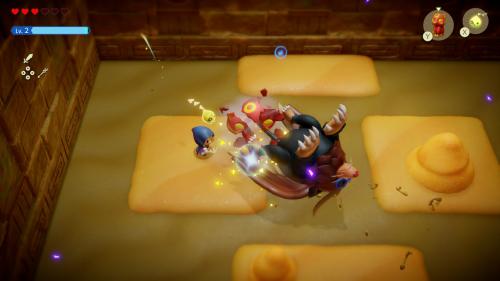
Faron Temple Miniboss - Diababa
Diababa is a large plant with multiple heads that will move around the Faron Temple dungeon. The first phase is a very straightforward fight: damage the Deku Baba heads a few times to stun them and then slash away at the red weak spot on their neck. Have a Darknut Lv. 3 alongside you to help. Once both heads are defeated the Diababa will leave the room. You'll need to go track it down in a different part of the dungeon.
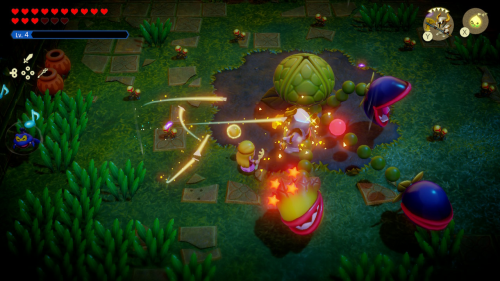
The second phase of the fight is similar to the last, except that Diababa now has four different heads of two different colors. The orange heads act the same as before. You can attack them with an echo (Darknut Lv. 3) or slash at them yourself to stun them and then attack the weak point on their neck. Take these two out first.
The blue Diababa heads are immune to normal attacks. However, you can use the fact that they eat anything in their path against them. Place a bomb or Bombfish echo in front of them and they will swallow it up and be stunned by the explosion. You can then attack their weak point and take them out like the other heads.
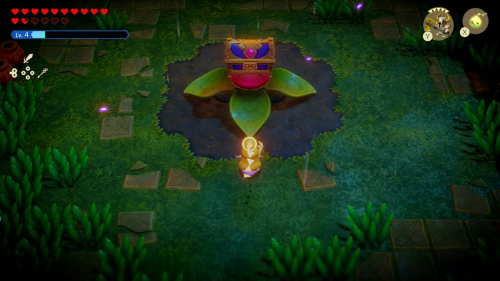
Faron Temple Boss - Gohma
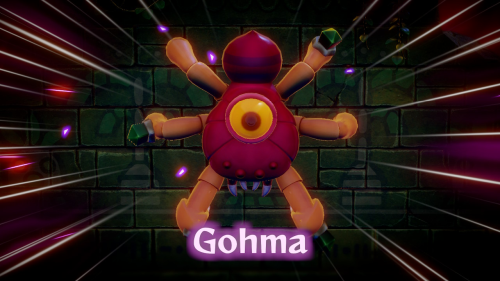
This is a familar boss in the Zelda series: (Queen) Gohma. During the first phase, she will hang on the wall and rotate around. She spits webs and lays her eggs. It's best to take them out while they are still in egg form. You'll notice there are small green crystals on some of her legs, which are actually electrical switches. You can summon an Electric Keese to do your dirty work for you. It will target these switches and when all three are activated Gohma will be stunned and you can get some slashes in on her eye.
In the second phase she'll take to the ground and attack you herself. Try to stick to the side of her body to avoid the very fast claws. Besides operating on the horizontal plane, this phase is very similar. Have an Electric Keese activate her switches and then slash at her eye when she is stunned. If you run out of energy, you can summon a Darknut Lv. 3 on her to do a lot of damage.
The final phase is a combination of the first two, where Gohma can stick to the wall or move on the ground. Make sure to balance attacking her switches with an Electric Keese and keeping the arena cleared so you don't get overwhelmed by small enemies. She can also shoot a lazer from her eye in this phase, so just dodge that until she switches to a different attack. Once she is stunned one more time you should be able to get enough slashes in to defeat her.
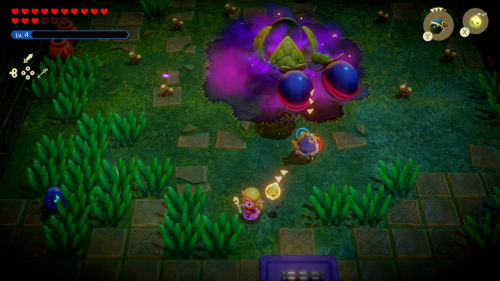
Hidden Ruins Boss - Smog
This fight is similar to the last one, but it takes place in a 2D sublevel, making it much more vertical in nature. Smog will split into three parts, and you'll need them to collidie to combine back into one monster you can damage.

The key to getting the parts to combine is to get them off the small platforms that they rotate around. If you can get them down into the lower area, you can place beds over the gaps to trap them down there. You can also bind to them to get them to switch directions. Once they are combined, you can summon ranged echoes and use arrows to deal damage to Smog.
In his second phase, Smog will split into five parts instead. It's more time consuming, but the process is the same. Get them to combine however you can and then deal damage to Smog in large form. Once defeated he will leave behind a Heart Piece, a couple monster stones, and many rupees.
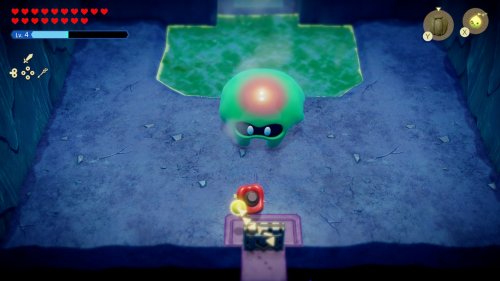
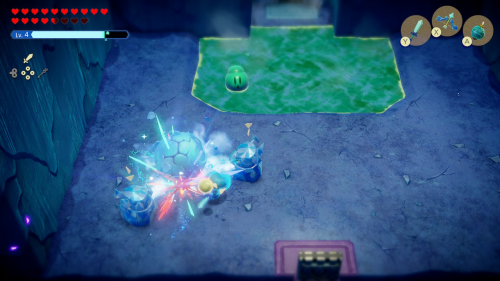
Lanayru Temple Miniboss - Green Slime
This miniboss fight is against a giant blob, Green Slime, that is immune to most attacks and can shoot hot spring water at you. Summoning a few Freezards is the best way to get it frozen. Once it's frozen, you can slash at it with your sword. Keep repeating this same process as the Green Slime breaks into smaller slimes. Make sure to quickly slash at frozen slimes before the unfrozen ones use a stream of hot water to melt them.
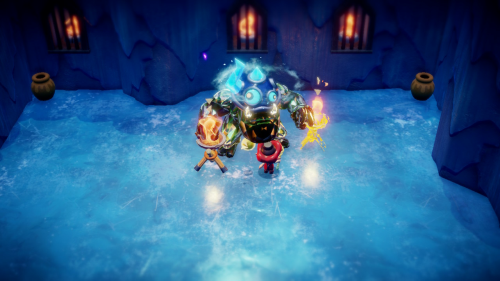
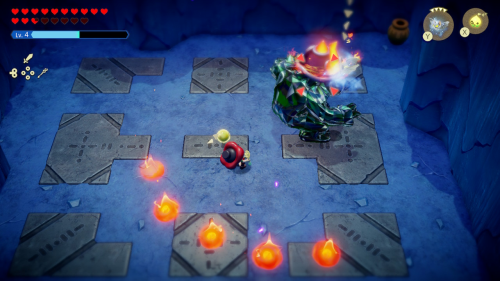
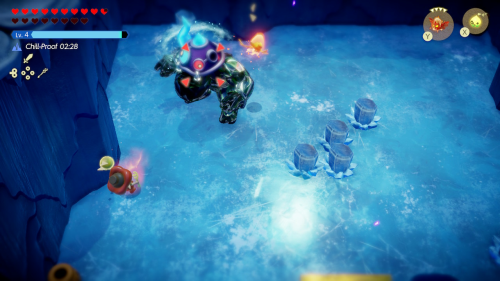
Lanayru Temple Boss - Skorchill
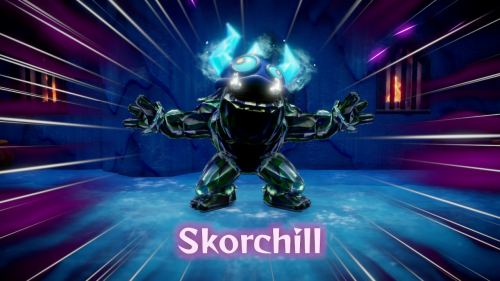

Enter through the boss door and you'll see what appears to be Condé's brother - but on closer inspection is a boss called Skorchill. He's a large monster like Condé that wheres a helmet. During the first phase, this helmet will have several frost spikes and you won't be able to damage Skorchill while the frost spikes are active.
The key to this fight is to attack the frost spikes on his helmet with fire. You can use various fire echoes to do this. A Fire Wizzrobe is a good bet, but a Fire Keese seems even better since it can stick around its head for awhile. You can also place Braziers right next to Skorchill to do a small amount of damage to the helmet. Once the helmet has been melted off, you can use swordfighter mode to attack its body directly.
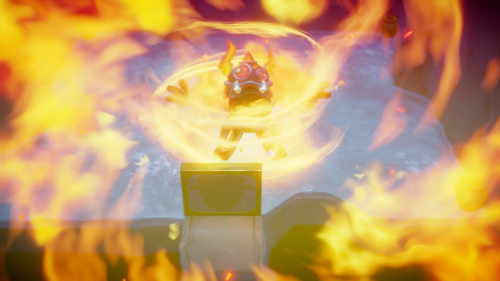
In the second phase of the fight, Skorchill will harness the power of fire instead of ice. The process is the same as before, except that you'll want to use water echoes to combat the helmet instead. Ice Wizzrobes or Ice Keese should do the job well. Once this helmet is destroyed, just wail away at his body with your sword.
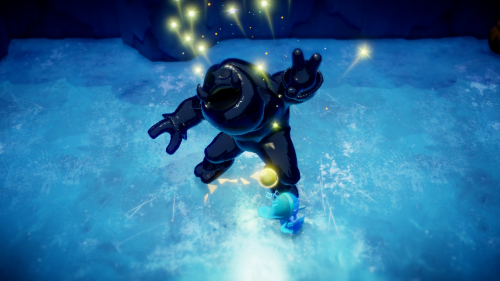
The third phase will go back to an ice helmet, but Skorchill will still use some of its fire attacks as well. Repeat the same process as before to destroy the helmet and then deal body damage. After enough damage is dealt, Skorchill will be defeated.
Stilled Ancient Ruins Boss - Zelda Echo
In this fight, Zelda Echo will float around and summon groups of echoes to distract you. These can be made quite trivial with a Lynel echo of your own. Have the Lynel take them out while you focus on shooting arrows at the Zelda Echo and getting in sword slashes when you can. Remember that you can target with ZL so you don't have to aim arrows manually. Once you do enough damage to her in the air, Zelda Echo will drop down and you can get a lot of sword slashes in.
During phase two of this fight Zelda Echo will continue to float around but start to summon groups of stronger enemies with elemental attacks. Repeat the process of having a Lynel take out the groups of enemies and focus on dealing damage to the Zelda Echo with your arrows and sword slashes. She will once again drop to the ground letting you get a lot of damage in before the next phase.
During phase 3 the Zelda Echo will change color and begin summoning very strong enemies, including things like Darknut Lv. 3. Your Lynel won't be able to mow down groups of these as easily, so give it some support by throwing in some bombs. Keep hitting the Zelda Echo with arrows while you can and she will eventually fall to the ground again and you can finish her off with some sword slashes.
Final Boss: Null
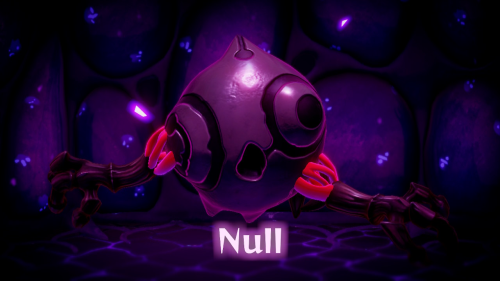
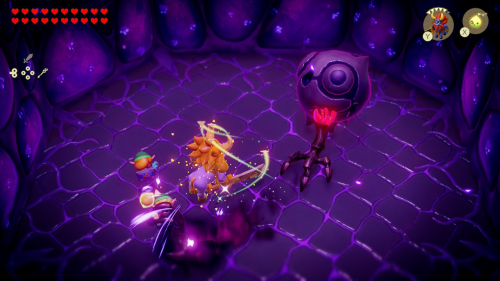
During this first phase Null will take the form of a large purple sphere with three arms. It will crawl around with its arms taking swipes at you and sending shock waves through the ground. You'll have to help Link take out each arm with a strong echo like a Lynel. Once all the arms are taken out, you and Link can attack the body directly.
Null will now hide in the walls and poke all of its arms out from different areas in the arena. You'll want to keep sending a Lynel out to attack these arms and collect hearts while Link does most of the work. Once all the arms have been defeated, Null will reattach them and walk through the arena on its own again.
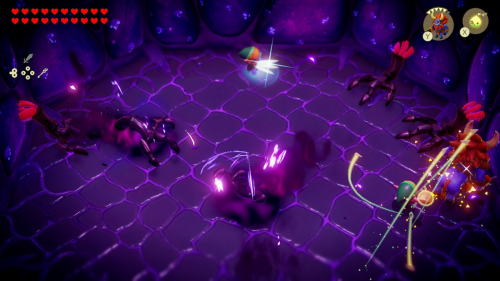
This process will repeat again, but this time Null can crawl around a little faster. Your strategy shouldn't change, since Link can still deal a lot of damage from afar with his arrows. Once taking it out in this form, Null will start using its arms to reach through the walls again. Repeat the process of attacking them again, this time watching out for the pools of acid that spawn near its arms.
Null will then start crawling around one more time, now summoning pools of acid as he crawls around. Keep using a Lynel to deal damage and once this cycle is over Null will then transition to phase two of this fight. Link will stay back to handle Null's arms while you will enter the portal to follow Null.
You will now be following null in an underwater sublevel, so you may want to adjust the accessories you have equipped. You'll need to follow Null to the right through the water. He now has tentacles that are wrapped around some of Tri's friends that you'll want to free.
Summon two Chompfin echoes to damage Null as you dodge its attacks. You can also bind to the the tentacles to slow Null down and expose some weakpoints by stretching the tentacles. Null will summon the boss Vocavor to help out, so you'll also need to dodge the whirlpools as you swim along.

Once your Chompfins have done enough damage to Null in this form, it will retreat once again and pull you into a portal it has created. You'll be back in the arena with Link. It will then transition to the third and final phase of this battle, where it now has five arms and floats around as a much larger blob of shadow energy.
You'll want to keep the strategy of summoning a Lynel echo to help Link deal damage to Null's arms in this phase. However, it will also transform into various forms based on all the bosses you've faced so far. You won't be able to damage Null while it's in a boss form, so simply dodge the attacks.
Once you've done enough damage to Null in its previous form, it will once again reach through the walls with its arms. It will now summon shadow monsters to attack you as well. You should focus on clearing the shadow monsters with a Lynel while Link does the damage to Null's arms. Null can also reach through the ground to try and grab you with an arm. The arm can't be damaged in this form, so just worry about dodging this attack.
After dealing enough damage Null will transition back to its floating form with five arms. This time it will summon stronger shadow monsters and bosses, including up to three Shadow Ganons at a time! Keep dealing damage by summoning Lynels as you are able. Eventually Null will move back to its wall form.
The wall form is very similar to the last, but Null will summon even more echoes now. If you get grabbed his hand from the ground, you'll need to use Link and your echoes to break yourself free. After dealing enough damage Null will emerge from the wall once again.

When Null takes on the Gohma form, it will leave spiderwebs on the ground. You may want to clear these with an Ignizol so you and your echoes aren't getting stuck. After dealing enough damage in this form Null will lose its power and the Triforce inside will be exposed. To finish the battle, bind to the Triforce to pull it out and mash "A" when prompted.
Thanks for using our Echoes of Wisdom boss guide!
