Our Tri Force Heroes bosses guide gives you the strategy you need to defeat every boss in the game. It's written from the perspective of single player, although the same strategies can be used for multiplayer. There is a boss at the end of each of the eight levels in the game, usually at the end of the temple.
Margoma
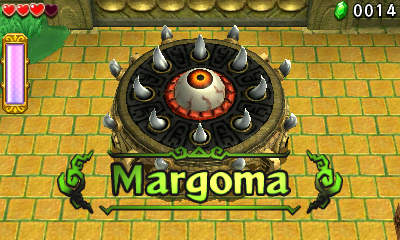
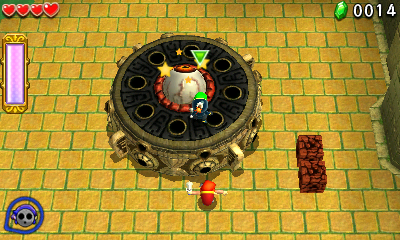
Level: Woodlands - Forest Temple Stage 4
Take each of the heroes to the north and down into the center of the room to spawn the Forest Temple boss by the name of Margoma. Take a single hero around to get Margoma to rush it. Now toss a bomb into the center opening once it gets stunned. Toss a hero on top of it when the eye appears and attack it with your sword.
Repeat this and Margoma will eventually raise up a level. Continue with the same strategy and stack up all of the heroes this time. Once you have successfully attacked the eye enough times – it will pop out and bounce around the room. Run around attacking it to defeat Margoma.
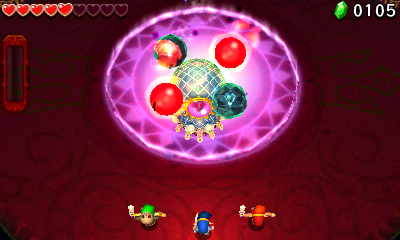
Arrghus
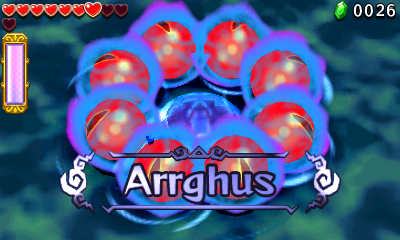
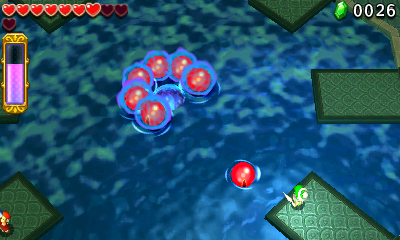
Level: Riverside - Water Temple Stage 4
Take all of the heroes to the north to spawn Arrghus. Now use the gripshot to pull the spinning objects towards you. Attack them and repeat until all of them are defeated. The water level will fall, so follow it to the center of the room.
Stack all of the heroes with a gripshot on the top. Use the gripshot to pull the red objects towards you and toss the top two heroes. Quickly attack the red object and repeat until they are all defeated once more. Arrghus will now open the eye in the center of the creature.
Stack all of the heroes with the gripshot hero on top. Now use the gripshot on the eye of Arrghus to stun the creature. Toss them and attack it with the sword. Repeat this process until he is defeated.
Moldorm
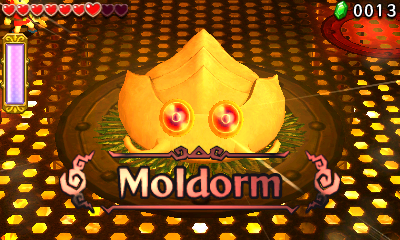
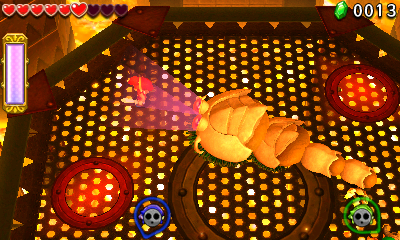
Level: Volcano - Fire Temple Stage 4
Take all of the heroes to the center of the area and fall down below to spawn Moldorm. Place each hero at different edges of the area. Moldorm will go after the currently selected hero until it reaches it and then it will switch to the next hero you select.
Select a hero and let Moldorm target it. Now switch to another hero and let Moldorm target it. This will get Moldorm in a pattern. You must have it going after a non-Bow hero and switch to the Bow Hero. Shoot an arrow at Moldorm’s tail to damage it.
Repeat the steps above until the creature’s tail raises up. Now stack the Bow hero on top of one of the other heroes. Repeat the steps from before to shoot an arrow at the creature’s tail to damage it. Keep repeating until Moldorm’s tail raises again. Now pick up the stacked heroes with the last hero.
Moldorm will run around randomly, so shoot the creature’s tail with arrows until it is defeated.
Blizzagia
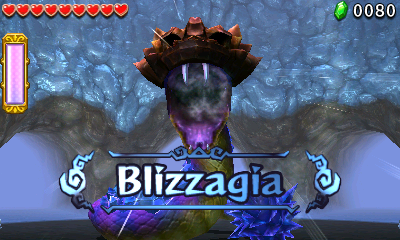

Level: Ice Cavern - Ice Temple Stage 4
Head north and smash or melt the ice blocking the way forward. Now slide down the slope to the north with all of the heroes and drop down to the east to spawn Blizzagia. Wait for it to come out of the caverns to the north and dodge it when it strikes.
Quickly run back to it and hit it with the Magic Hammer. Repeat this process several times and the creature will make the area covered in ice and casually slither around. Simply attack it more with the Magic Hammer to knock the armor off of it.
Continue doing this until all of the armor falls off and the creature exposes the weak spot on its head. Now run around and attack the weak spot. Repeat until Blizzagia is defeated.
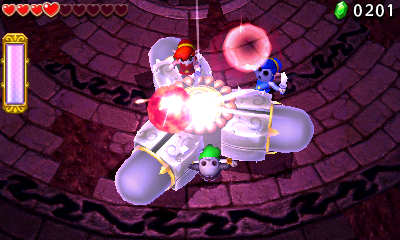
The Lady's Pets
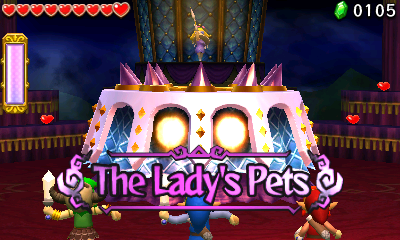
Level: Fortress - The Lady's Lair Stage 4
When you enter this stage, you'll be entroduced to Lady Maud. Aftward, walk forward into the main arena. This stage is a boss battle against The Lady's Pets. It essentially combines three previous bosses into one battle.
For the first phase, you'll be fighting Margoma agian. Get a two stack totem with the boomerang on top. Grab a bomb from the sides with the boomerang and toss it into the opening on top of the boss. This will expose the weak point, which you can then toss a hero up to attack with a sword. Repeat this cycle until this phase is complete.
This second phase is a revisitation of Moldorm. The boss will follow you closely, so you'll need to switch between heroes quickly to get him off your tail. Keep a two stack totem ready and the boomerang hero on the ground. Use the boomerang to throw bombs at Moldorm's head to stun it, and use the two stack to attack its tail. After a few bouts of this, Moldorm will run around wildly, with his tail even higher. Use a three stack with the Boomerang on top to attack him.
In the third and final phase is Arrghus. Create a three stack totem with the gripshot on top. Use this to hit his eye, which will leave him in a vulnerable state. You can get some sword slashes in when he's like this. Just repeat this process a few times until this phase and the entire boss is defeated.
Stalchampion
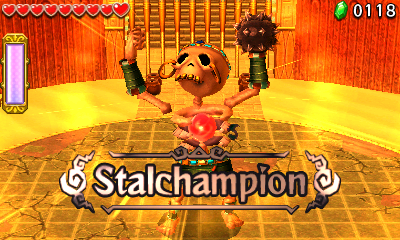
Level: The Dunes - Desert Temple Stage 4
Once you move to the center of this stage, you'll be fighting a boss called Stalchampion. For the first phase of this fight, you'll want to position each hero spread out across the edge of the arena. This is because you'll need to the Stalchampion from behind when he's distracted attacking something in front of him. Once you do, you need to slash him again to break up his body. Once that happens you can go to town on his torso with your hammer to deal damage, being careful to avoid the spiky ball. Repeat this a few times for the first phase.
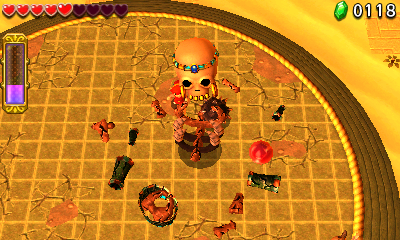
The second phase is very similar to the first, but now the Stalchampion moves much faster. He also will come down with a powerful ring attack after you attack his torso, so move off the stage into the sand to avoid it. Either way, you'll repeat the same process as phase 1 to complete this phase.
In the final phase, the Stalchampion will float around as a ghost head. The spike ball will roll at you very agressively, and the Stalchampion head will dive at you if it gets close. You'll want to lure the head down with one of the hammer heroes, then use the boomerang hero to stun it. You can then deal damage with your sword. One trick you can sometimes use is to go slightly off the arena, as the spiked ball can't follow you out there but you can still hit the head with your boomerang. After enough hits the Stalchampion will be defeated.
Prismantus
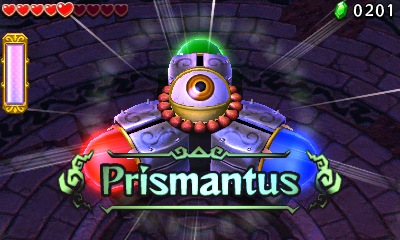
Level: The Ruins - Grim Temple Stage 4
In this stage, walk to the center of the arena for a fight with the boss of The Ruins called Prismantus. In the first phase, Prismantus will spin around horizontally and attack by moving quickly towards you while spinning. After the initial lunge, he will slow down allowing you to get some hits in at the obvious weak spots that you need to hit with the respective colored hero. After hitting each color twice, he will be stunned. You can then toss a hero on top of him and slash away at the eye.
In the second phase, Prismantus will act very similarly, but he will be rotated and spin vertically instead. You can hit the colored bulbs whenever they are on the ground, and he'll stop briefly after doing three rotations. Once all have been hit twice once again, you can toss a hero up and slash away at his eye.
The third phase is like the second, but when Prismantus pauses he pivots on a singular bulb and shoot a lazer out of his eye. You can hit the bulbs as he rotates vertically, but you can also totem up to reach them when he does his lazer attack. Once you've hit them all twice again, he'll fall over. Throw a hero onto him and slash away at his eye to defeat him.
The Lady
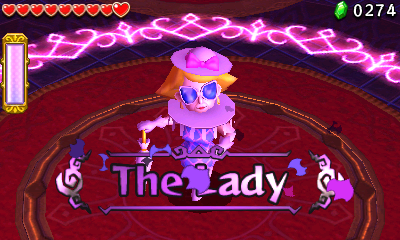
Level: Sky Realm - Sky Temple Stage 4
This is the final stage of the game and is a boss bottle with the final boss of the game, who has several phases. It starts out with a cutscene where Lady Maud steals all your weapons. This means you'll have to defeat her with only your swords. Head north and fill up on health along the way if you need.
In the first phase, create a full totem and toss a two stack over the spinning ring. Wait for The Lady to toss her parasols and then toss a hero onto the platform with her to get some slashes in. She'll knock you off the platform afterward, but just repeat this process a few times. Eventually the spinning ring will go away and she will run around the battlefield targeting a certain hero (indicated by colored lightning bolts). Just switch to another hero and attack her from behind.
In the second phase, you'll have to play a volley game with some dangerous lightning orbs that The Lady shoots your way. However, she sends out differnt colored orbs that can of course only be volleyed by the respective heroes. For single player, the trick to this is to line up all three heroes close to each other. If she sents the right color to the hero you are controlling, hit it back. If not, it will bounce off one of the heroes and change color, giving you another opportunity to smack it. It doesn't always change to the color you need, so this can be a pretty tricky process. But once you volley enough the orbs will stun her and you can get your shots in.
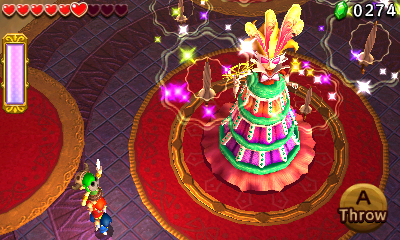
The third phase is where things start to get a little dicey. The Lady will stand on a circus tower and different colored parasols will surround her. You'll have to throw heroes of the correct color on top of them to reach her and get some slashes in. Any hero can stand on a white parasol. There are some lower and some higher ones that require you to toss the top hero or a two stack respectively.
While you are trying to do this, the parasols will routinely collapse and be launched at you. They will then emit circles of electricity that you will need to avoid on the ground. This can be tricky, but just keep at it and be patient until you get a parasol that you can safely toss up onto. After a few cycles, she will move on to her final phase.
The fourth and final phase is actually easier than the third. The Lady will rise even higher on her platform, but she will now send her colored parasols down to ground level so you can just walk on them. Create a full totem and walk on the parasol color that matches your totem botom. It will then bring you to The Lady where you can get a lot of hits in and even finish her in one cycle of this. There will still be parasols and electricity to dodge, so keep being careful around those.
After you get enough hits in the final boss of the game will be defeated! Plenty of rupees will drop and you can head to the final Triforce Gate of the game.
Thanks for using our Tri Force Heroes Boss guide!
